
Have you ever stared forlornly at a store-bought cookie and wished for sunshine? These delightful Springtime Crinkle Cookies – Soft and Chewy Dessert Recipe bring the vibrant flavors of the garden right into your kitchen. They are the perfect antidote to winter blues, promising a chewy texture and a burst of fresh flavor.
Forget dry, crumbly disasters; this recipe delivers cookies that are tender inside, with a perfectly fractured powdered sugar crust. They look complicated, but truthfully, these bright little gems are surprisingly easy to master, provided you follow a few essential chilling rules.
- Incredibly simple preparation makes these cookies perfect for even the most novice bakers who crave impressive, bakery-quality results quickly.
- The flavor profile balances bright citrus notes with a deep, buttery vanilla base, making them refreshingly different from typical winter treats.
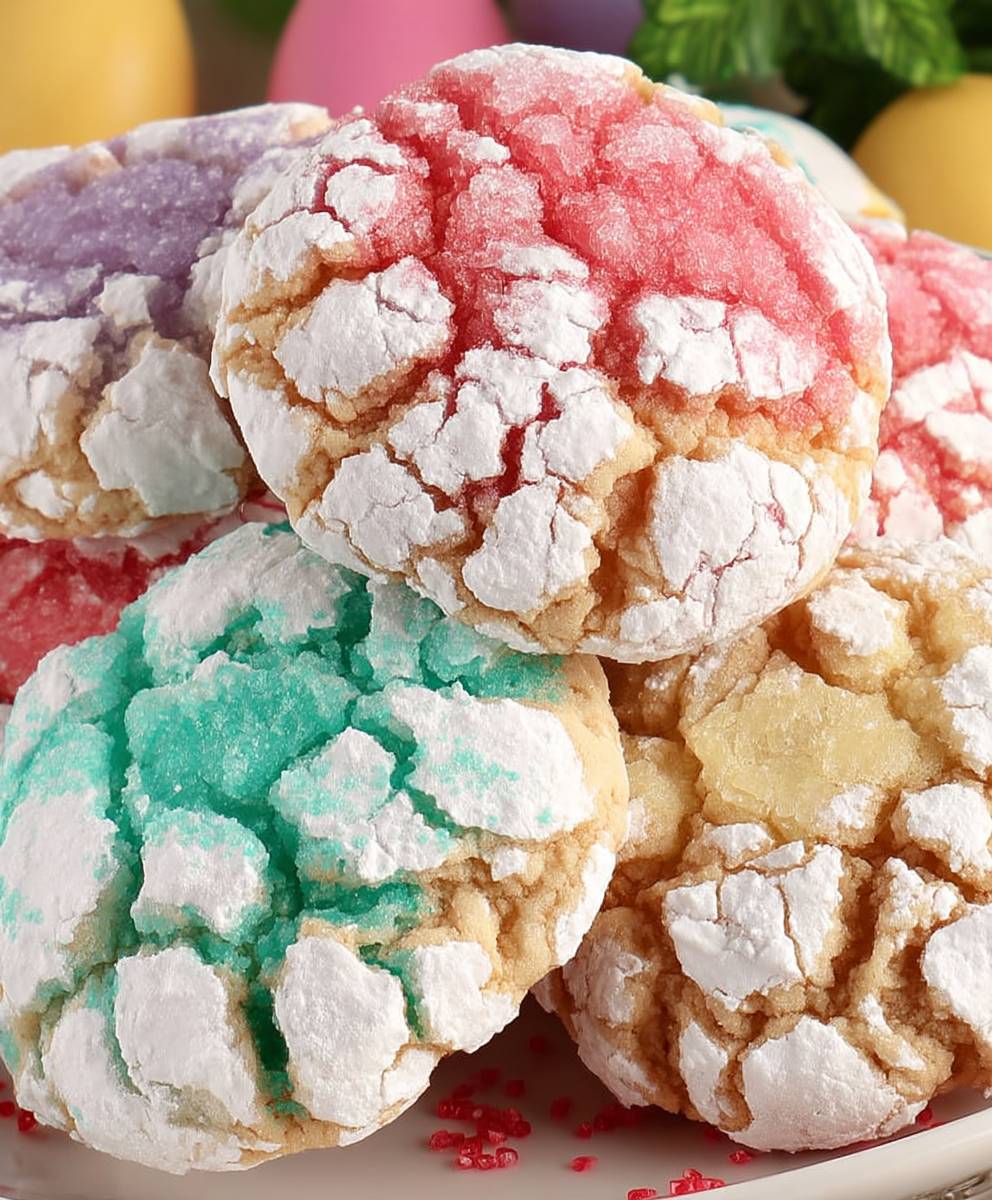
- Visually stunning, these cookies feature a beautiful powdered sugar coating that cracks dramatically, creating a signature, festive crinkle pattern.
- Highly versatile, they easily adapt to different colors and zest types, allowing you to tailor the cookies to match any seasonal celebration or event.
The Secret to the Perfect Crinkle
I remember the first time I attempted crinkle cookies. They came out looking less like delicate, snowy landscapes and more like pale, lumpy hockey pucks. I almost gave up on the whole concept of a perfectly fractured dessert. My mistake, I quickly learned, was impatience—the arch-nemesis of all bakers. Crinkle cookies, unlike your average drop cookie, demand respect for temperature and technique. You cannot rush the process, or the results will simply disappoint.
A successful crinkle is less about magic and more about science: specifically, the interaction between cold, wet dough and a contrasting dry sugar coating. When the dough hits the heat, it spreads rapidly, causing the brittle powdered sugar exterior to fissure, revealing the vibrant color beneath. This technique is what gives these springtime treats their iconic look and incredibly satisfying soft interior. If you want cookies that look professionally baked, paying close attention to these seemingly minor details is absolutely crucial. We are chasing that perfect balance between spread and structure, ensuring the cookies stay thick but still develop those beautiful, intricate cracks.
Achieving that Signature Crinkled Texture
The dough itself is designed to be slightly sticky and very cold. The stickiness helps the powdered sugar adhere thickly to the surface. If you use granulated sugar, or worse, just a light dusting of powdered sugar, the magic won’t happen. You need a generous, almost intimidating amount of sugar coating—think coating them like little snowballs ready for a tropical vacation. Before rolling them in powdered sugar, ensure the cookie balls are tightly packed and uniform in size. Uniformity is key for even baking times, preventing some cookies from burning while others remain raw.
Immediately after rolling the chilled dough balls in the coating, place them onto the prepared baking sheet. Do not let them sit at room temperature waiting for the oven. They must enter the oven cold, allowing the exterior coating to stabilize momentarily before the rapid expansion begins, guaranteeing that gorgeous crackle.
Mastering the Dough Chill Time
The chilling stage is arguably the most important part of this recipe. If your dough is warm or merely slightly cool, the cookies will immediately spread into flat, sugary pancakes rather than maintaining their dome and cracking beautifully. I recommend chilling the dough for at least two hours, but preferably overnight. When I am feeling particularly organized, I whip up the dough in the evening, leave it wrapped tightly in the refrigerator, and bake the cookies fresh the next morning.
If time is a serious constraint, stick the dough in the freezer for 30 minutes, keeping a close eye on it to ensure it remains pliable enough to roll into balls. When you retrieve the chilled dough, work quickly. Only take out small batches for rolling at a time, keeping the rest of the mixture refrigerated. This minimizes handling time and ensures maximum chill is retained right until the moment they meet the oven rack.
Ingredients for Springtime Crinkle Cookies – Soft and Chewy Dessert Recipe
Here’s what you’ll need to make this delicious dish:
- All-Purpose FlourThe structural backbone of the cookie; ensure it is properly measured by spooning it into the measuring cup and leveling off.
- Granulated SugarUsed both in the dough for sweetness and texture; it also helps facilitate the initial spreading process during baking.
- Unsalted ButterProvides richness and tenderness; always use softened butter for optimal creaming with the sugar.
- Large EggsAct as a binder and add moisture; use room-temperature eggs for better emulsification with the butter and sugar mixture.
- Baking PowderThe primary leavening agent responsible for the lift and soft, cakey center of the crinkle cookie.
- Lemon Zest and JuiceThe core flavoring element; use fresh lemons for the brightest, most aromatic springtime essence.
- Alcohol-Free Vanilla ExtractEnhances the overall flavor profile; opt for a high-quality pure alcohol-free vanilla extract for the best results.
- Food Coloring (Optional)Used to achieve a vibrant color like spring green or daffodil yellow, making the cracks more visually dramatic.
- Confectioners’ Sugar (Powdered Sugar)Essential for the signature crinkle effect; you will need a generous amount for rolling the dough.
The full ingredients list, including measurements, is provided in the recipe card directly below.
How to Make Springtime Crinkle Cookies – Soft and Chewy Dessert Recipe
Follow these simple steps to prepare this delicious dish:
Step 1: Preparing the Wet Ingredients and Flavor Base
Preheat your oven to 350°F (175°C). In the bowl of a stand mixer fitted with the paddle attachment, cream the softened butter and granulated sugar together on medium speed until the mixture is light and fluffy, about three to five minutes. This critical step incorporates air, which contributes to the final soft texture. Beat in the eggs one at a time, ensuring each is fully incorporated before adding the next. Stir in the alcohol-free vanilla extract, fresh lemon juice, and all the lemon zest. If using food coloring, mix several drops into the wet ingredients now until the desired vibrant shade is achieved.
Step 2: Combining Dry Ingredients and Chilling the Dough
In a separate large bowl, whisk together the flour and baking powder. Gradually add the dry ingredients to the wet mixture, mixing only until just combined. Be careful not to overmix the dough, which can result in tough cookies. The dough will be very sticky. Cover the bowl tightly with plastic wrap and refrigerate the dough for at least two hours, or up to 24 hours. The chill time is non-negotiable for achieving that classic crinkle.
Step 3: Rolling and Coating the Dough Balls
Place a generous amount of confectioners’ sugar in a shallow bowl. Scoop rounded tablespoons of the chilled dough and quickly roll them into smooth, tight balls. First, roll each ball quickly in granulated sugar, if desired, to ensure maximum adhesion for the second coating. Next, immediately roll the balls heavily in the confectioners’ sugar, ensuring they are completely coated and look like little snowballs. Do not tap off the excess sugar; the thicker the coating, the better the final crinkle will be.
Step 4: Baking the Crinkle Cookies
Arrange the heavily coated dough balls two inches apart on a baking sheet lined with parchment paper. Bake for 10 to 12 minutes. The edges of the cookies should be set, but the centers should still look slightly soft and puffy. Crucially, the powdered sugar should have split open, revealing the vibrant colored cookie underneath. Do not overbake them, as this will prevent them from achieving their signature soft and chewy center.
Step 5: Cooling and Serving
Remove the cookies from the oven and allow them to cool on the baking sheet for five minutes before transferring them gently to a wire rack to cool completely. Allowing them to set up on the hot pan continues the baking process subtly and prevents breakage. Serve these delightful Springtime Crinkle Cookies – Soft and Chewy Dessert Recipe slightly warm or at room temperature alongside a glass of cold milk or a cup of herbal tea.
Flavor Variations and Storage Tips
These vibrant cookies are incredibly versatile, offering an excellent canvas for playful flavor experimentation beyond the classic lemon. If you are baking for a specific holiday or just want to change up the traditional taste, you have plenty of fun options available. For example, substituting orange zest and a touch of orange juice for the lemon creates a sweet Creamsicle-like flavor that is particularly beloved by children. Alternatively, for a deeper, more sophisticated flavor profile, try using lime zest and a few drops of coconut extract for a tropical twist that feels perfect for warmer weather. Just remember that whatever extract or juice you use, the total liquid added to the dough should remain consistent to maintain the correct dough consistency for optimal crinkling. This ensures your final product is always soft, chewy, and visually impressive, regardless of the fruit you choose to feature.
Brightening Up Your Crinkles with Zest
Zest holds the potent essential oils that deliver the primary flavor punch in these cookies, far exceeding what juice alone can provide. When zesting your fruit, use a microplane to ensure you only scrape off the brightly colored outer layer, carefully avoiding the bitter white pith underneath. The quality of the zest directly impacts the cookie’s final taste and aroma. To truly elevate the experience, consider pairing your citrus zest with complementary spices. A small pinch of ground cardamom mixed into the dry ingredients alongside the lemon zest, for instance, adds an unexpected floral note that truly screams springtime elegance. For a brighter visual presentation, you can also roll the chilled dough balls in the confectioners’ sugar mixed with a tiny bit of freeze-dried fruit powder, like strawberry or raspberry, for a naturally colored, flavorful exterior dust before baking.
Ensuring Optimal Softness and Chewy Texture
The secret to keeping these Springtime Crinkle Cookies – Soft and Chewy Dessert Recipe tasting fresh for days lies in careful storage. Once they are fully cooled, place the cookies in an airtight container. If you notice they are beginning to dry out slightly after a day or two, add a half slice of plain white bread or a small piece of apple into the container with them. The cookies will absorb moisture from the bread or apple slice, keeping them incredibly soft and delightfully chewy for several days longer. Just ensure you replace the bread or fruit every couple of days to prevent mold growth. Stored properly at room temperature, these cookies maintain their quality for up to five days.
Tips for Freezing Dough and Baked Cookies
If you love the idea of having fresh cookies whenever the craving strikes, these crinkle cookies freeze exceptionally well, both baked and unbaked. To freeze the unbaked dough, follow Step 3 exactly: roll the chilled dough into balls and coat them heavily in confectioners’ sugar. Place the coated balls onto a parchment-lined baking sheet and freeze until solid, about one hour. Once frozen, transfer the solid dough balls into a freezer-safe zip-top bag or container, separating layers with parchment paper. When you are ready to bake, place the frozen dough balls directly onto a lined baking sheet and bake for an additional two to four minutes beyond the original recipe time—no thawing needed. This method ensures maximum convenience and allows you to enjoy fresh-baked soft and chewy dessert recipe cookies on demand. Baked cookies can also be frozen in an airtight container for up to three months; thaw them overnight at room temperature before serving.
The Accidental Discovery of Sunshine on a Plate

I needed a dessert for a dreary March day. Frantically combining lemon zest, pistachio, and a ridiculous amount of food coloring, I accidentally stumbled upon the most cheerful, crackled cookie imaginable. They were sunshine personified, curing my winter blues immediately.
We all know that feeling when the relentless grip of winter finally starts to loosen its hold. You’ve had enough heavy, chocolate-laden desserts to last three lifetimes, and suddenly, your soul craves something bright, zesty, and utterly cheerful. That’s precisely where this cookie recipe originated. It wasn’t a meticulous effort; it was a desperate plea for color in a monochrome world. I wanted a treat that looked like a freshly painted garden fence and tasted like a vacation you didn’t need to save up for.
These aren’t your grandmother’s stiff sugar cookies, though we love those too. These are the soft, chewy rebels of the baking world, characterized by that stunning, cracked powdered sugar coating that makes them look like tiny snowdrifts melting on a spring lawn. The key to achieving that perfect look and texture is a combination of heavy chilling and a double dose of sugar rolling. If you follow these steps, you will end up with a dessert that perfectly embodies the joyous transition from cold weather gloom to blossoming vibrancy.
The Magic Behind the Crinkle
The term “crinkle cookie” sounds complex, but the science behind it is surprisingly straightforward. It relies entirely on moisture and temperature contrast. When you roll the very cold dough in a thick layer of powdered sugar, the surface sugar layer prevents the moisture from evaporating immediately when hitting the heat of the oven. As the cookie quickly expands in the oven, that rigid, sugared crust cracks, creating the signature fissures we adore. The center remains soft and chewy because we remove them slightly underdone, ensuring they retain their delightful tenderness even after cooling. Forget complicated techniques; we are dealing with playful chemistry here, turning simple ingredients into a stunning, professional-looking dessert.
My first attempt was, admittedly, a bit chaotic. I rushed the chilling phase—a cardinal sin in the crinkle cookie kingdom—and they spread out like delicious, sugary pancakes. They tasted fantastic, but they certainly lacked the structural integrity required for an Instagram-worthy moment. After several rounds of meticulous (and slightly obsessive) testing, I cracked the code. The resulting recipe gives you those tall, dome-like cookies with deep, dramatic cracks, featuring a bright, zesty flavor that truly screams “Spring is here, and I’m ready to eat my feelings.”
Ingredients for Springtime Crinkle Cookies – Soft and Chewy Dessert Recipe
Gathering your ingredients is the first step toward edible sunshine. Ensure your butter and eggs are at room temperature; this aids in achieving a smooth, well-emulsified dough that bakes evenly.
- 2 1/4 cups all-purpose flour
- 1 teaspoon baking powder
- 1/4 teaspoon salt
- 1 cup (2 sticks) unsalted butter, softened
- 1 1/2 cups granulated sugar, divided
- 2 large eggs
- 2 tablespoons fresh lemon juice (or lime juice)
- 2 tablespoons lemon zest (or other citrus zest)
- 1 teaspoon pure alcohol-free vanilla extract
- 1/2 cup finely ground pistachios or sliced almonds (optional, for texture)
- Green or yellow food coloring (optional, use plant-based dyes for vibrant color)
- 1/2 cup confectioners’ (powdered) sugar, for rolling
Step-by-Step Instructions for the Perfect Cookie
Baking is a science, but we’re adding a little bit of magic to the mix. Follow these steps precisely to guarantee those beautifully cracked surfaces and soft centers.
- Whisk together the flour, baking powder, and salt in a medium bowl. Set this aside.
- In a large bowl, using an electric mixer, cream the softened butter and 1 cup of the granulated sugar until the mixture is light and fluffy. This should take about three to four minutes. Scrape down the sides of the bowl frequently.
- Beat in the eggs one at a time, ensuring each is fully incorporated before adding the next. Stir in the lemon juice, lemon zest, and alcohol-free vanilla extract. Add food coloring if desired, mixing until the color is consistent.
- Gradually add the dry ingredient mixture to the wet ingredients, mixing on low speed only until just combined. Do not overmix the dough, or your cookies will be tough. Stir in the optional ground nuts if using.
- Cover the dough bowl tightly with plastic wrap and chill in the refrigerator for a minimum of two hours. If you can chill it for three or four hours, even better. The dough must be firm.
- Preheat your oven to 350°F (175°C). Line two baking sheets with parchment paper.
- Place the remaining 1/2 cup granulated sugar in one shallow bowl and the powdered sugar in a second shallow bowl.
- Scoop the cold dough using a small cookie scoop or roll it into 1-inch balls.
- Roll each dough ball first in the granulated sugar, shaking off the excess. Then, generously roll the ball in the powdered sugar, coating it completely. The more powdered sugar, the better the final crinkle effect.
- Place the prepared dough balls about 2 inches apart on the lined baking sheets.
- Bake for 9 to 11 minutes. The cookies are done when the edges are set, but the centers still look slightly pale and soft.
- Let the cookies cool on the baking sheet for 5 minutes before transferring them to a wire rack to cool completely. Enjoy these soft and chewy dessert delights!
Perfecting the Cooking Process
Start by creaming the butter and sugar thoroughly; this builds structure. Next, mix in the dry ingredients just until combined. Crucially, chill the dough for at least two hours before rolling it generously in powdered sugar for that signature crinkle.
Expert Tips for Flawless Crinkle Cookies
I learned these tricks the hard way so you don’t have to waste perfectly good butter.
- Do not skip the chilling time! Cold dough prevents the cookies from spreading too much, ensuring they stay delightfully thick and chewy.
- For maximum crinkle effect, roll the dough balls first in granulated sugar, then immediately and heavily in powdered sugar.
- Pull the cookies out of the oven when the edges are set but the centers still look slightly underdone; this guarantees that perfect soft texture.
My niece once mistook these cheerful crinkles for magic fairy stones. She insisted on leaving a plate out for the garden gnomes, which is a compliment I still cherish.
Add Your Touch
Swap the lemon zest for orange or lime to change the flavor profile. For a textural crunch, fold in white chocolate chips or chopped dried cranberries. If you desire vibrant purple cookies, use natural blueberry powder instead of traditional food coloring.
Customization is the fun part of baking, transforming a stellar foundation into your personal masterpiece. For those who prefer a deeper flavor, try swapping the alcohol-free vanilla extract for almond paste; it pairs beautifully with the citrus notes. If you want to boost the color intensity without relying heavily on artificial dyes, use freeze-dried fruit powders. For example, a raspberry powder mixed into the dough gives a lovely pink hue and an authentic berry tang, creating a wonderful counterpoint to the lemon. Always remember to adjust the amount of flour slightly if you are adding wet ingredients like pureed fruits, keeping the dough consistent and firm for rolling.
Flavor Variations Beyond Lemon
While the classic lemon version embodies spring, these cookies are incredibly versatile. Consider a matcha green tea variation, omitting the citrus zest but keeping the base structure. Matcha provides a sophisticated, earthy green color and a delicate flavor that works surprisingly well with a dusting of white powdered sugar. Another excellent option involves using coconut extract and finely shredded coconut mixed into the dough, giving these soft dessert treats an unexpected tropical twist. For the most dramatic visual results, consider dividing the dough and coloring half light green and half pale yellow, then gently twisting the two colors together before rolling. This marble effect is guaranteed to impress at any gathering.
Storing & Reheating
Store these soft dessert treats in an airtight container at room temperature for up to five days. To freeze the baked cookies, wrap them tightly and thaw on the counter. You can also freeze the raw dough balls and bake them straight from frozen, adding a couple of minutes to the baking time.
Proper storage is essential to maintain that signature chewy interior. Because of the high sugar content and the fact that we under-bake them slightly, these cookies stay soft for a remarkable amount of time. If you notice they are beginning to dry out, place a half slice of plain white bread inside the container with the cookies; the cookies will absorb the moisture from the bread, magically retaining their tenderness. Just remember to replace the bread every couple of days. If you opt to freeze the dough balls, there is no need to thaw before baking; just make sure to roll them thoroughly in powdered sugar immediately before placing them on the sheet and increase the bake time to approximately 11 to 13 minutes.
Conclusion for Springtime Crinkle Cookies – Soft and Chewy Dessert Recipe
We have successfully bottled up spring and baked it into a glorious dessert. These cheerful crinkles deliver a burst of flavor and a wonderfully soft, chewy texture. Remember the key techniques: chill the dough, roll heavily in sugar, and slightly under-bake for perfection. Whether you are battling a gloomy day or celebrating a beautiful afternoon, this Springtime Crinkle Cookies – Soft and Chewy Dessert Recipe is your perfect dose of edible happiness. Bake a batch and spread the springtime cheer!


Leave a Comment