
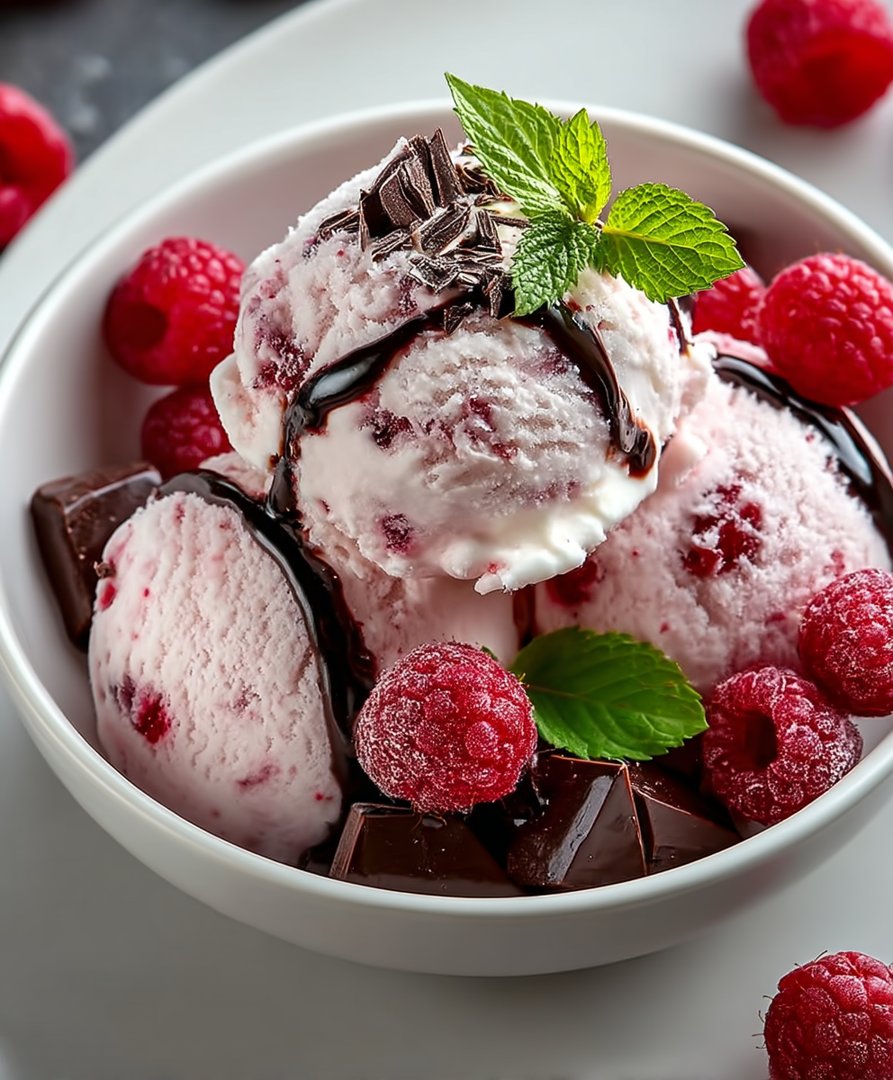
If there’s one dessert that embodies spontaneous joy mixed with minor panic about freezer burn, it’s homemade ice cream. Forget boring vanilla; we are diving headfirst into the swirling perfection that isRaspberry Chocolate Chunk Ice Cream. This isn’t just dessert; it’s an emergency happiness plan you can execute in your pajamas. We’re trading those overly sweet, mystery-ingredient supermarket tubs for a rich, creamy homemade chocolate raspberry delight that tastes exactly like summer romance mixed with high-quality dark chocolate shrapnel. Prepare yourself for the most dazzling, tangy, and deeply satisfying frozen treat you have ever churned.
- This recipe delivers a stunning balance of tart raspberries and rich, bittersweet chocolate, creating an unforgettable flavor profile.
- The process is surprisingly simple, requiring minimal fuss for maximum creamy indulgence right from your home kitchen freezer.
- Visually, the vibrant streaks of crimson raspberry jam swirling through the pale pink base look absolutely breathtaking in the cone.
- Enjoy this versatile treat during a blistering summer afternoon or as a decadent, comforting midnight snack any time of year.
The Perils and Triumphs of Homemade Ice Cream
Making ice cream at home often feels like a high-stakes scientific experiment, especially when you are aiming for something as luxurious asRaspberry Chocolate Chunk Ice Cream. I spent years convinced that my freezer was locked in a bitter feud with dairy products, resulting in desserts that were either rock-solid blocks of sadness or grainy, partially melted puddles. The secret, I finally discovered, is less about brute force freezing and more about patience, proper chilling, and understanding the role of fat and sugar. If you don’t treat the ice cream base with the reverence it deserves before churning, you end up with crystallized disappointment.
One summer, I attempted a different berry swirl frozen dessert, convinced I could rush the process. I dumped the warm custard base straight into the ice cream maker, expecting immediate magic. What I got was essentially sweet, thick soup mixed with lukewarm fruit pulp. It was a disaster so comprehensive that even my dog looked concerned. This experience taught me that ice cream doesn’t tolerate shortcuts. It demands dedication—specifically, 8 hours of patient chilling before the churning even begins. This rigorous cooling period is crucial because it ensures the fat molecules solidify and the texture remains smooth and velvety, rather than icy.
Why Chunks Beat Shards Every Time
When you hear “chocolate chip,” you probably imagine those uniform, tiny drops that melt immediately. But we are aiming for something structurally superior: the chunk. A chocolate chunk offers textural integrity. When you bite into a scoop of this ice cream, you want a satisfying, almost shatteringly crisp moment of dark chocolate contrast against the smooth, tart berry base. Shards are acceptable, but proper, hefty chunks are non-negotiable for this recipe.
I recommend using high-quality dark chocolate, ideally 60% cacao or higher, chopped roughly by hand. Avoid using pre-packaged chocolate chips designed for baking, as they often contain stabilizers that prevent them from breaking apart cleanly in the frozen mixture. For the best flavor, look for a bar of bittersweet chocolate and chop it unevenly. This variation in size ensures that every spoonful of the creamy frozen treat offers a slightly different experience, sometimes a small melt of chocolate, sometimes a glorious, substantial crunch.
The Magic of the Raspberry Swirl
The raspberry component of thisRaspberry Chocolate Chunk Ice Creamserves two roles: providing intense flavor and creating that stunning visual ripple. We are not just mixing raw berries into the base; we are creating a concentrated raspberry purée, almost a jam, that is vibrant, intensely flavored, and slightly tart. This tartness cuts through the richness of the cream and the sweetness of the sugar, preventing the ice cream from feeling heavy or cloying.
To prepare the perfect swirl, combine fresh or frozen raspberries with a bit of sugar and a tablespoon of fresh lemon juice. Simmer this mixture gently until the berries break down completely, releasing all their beautiful juices. Once reduced and slightly thickened, strain the mixture through a fine-mesh sieve to remove the seeds. This step is mandatory unless you enjoy the sensation of tiny, crunchy debris interfering with your otherwise perfect velvety dessert. Allowing the purée to cool fully before swirling it into the churned ice cream base is key to achieving defined, beautiful streaks rather than a muddy pink mess.
Selecting the Right Dairy Base
The foundation of any spectacular homemade ice cream is the dairy. You need richness, and you need it in bulk. This recipe calls for a classic combination of heavy cream and whole milk. Do not, under any circumstances, try to substitute skim milk or low-fat cream, thinking you are doing your waistline a favor. When frozen, low-fat dairy creates large ice crystals, resulting in that aforementioned rock-solid sadness. Fat is what keeps the ice cream smooth, pliable, and scoopable straight from the freezer.
Some recipes call for egg yolks to create a rich custard base, but this recipe is designed to be slightly faster and requires no tempering. We achieve the necessary viscosity and structure primarily through the high fat content and the addition of a small amount of sugar, which lowers the freezing point. The resulting texture is delightfully dense yet remains creamy, giving that satisfying resistance when you push the scoop into the carton. Remember, quality dairy translates directly into a quality creamy frozen treat.
Ingredients for Raspberry Chocolate Chunk Ice Cream
Here’s what you’ll need to make this delicious dish:
- Heavy CreamUse high-quality heavy cream (at least 36% fat) to ensure maximum richness and a smooth, scoopable texture.
- Whole MilkCombine with heavy cream to balance the fat content and create the perfect consistency for churning.
- Granulated SugarEssential for both sweetness and structure, as sugar helps lower the freezing point, keeping the ice cream softer.
- Vanilla Bean PasteUse pure vanilla bean paste, not imitation, to enhance the depth of the dairy base and complement the fruit.
- Fresh or Frozen RaspberriesThese form the concentrated purée needed for the intense flavor and beautiful, tart ripple.
- Lemon JuiceA small amount brightens the raspberry flavor and helps balance the sweetness of the base.
- Dark Chocolate BarChoose a high-quality bittersweet chocolate (60% to 70% cacao) and chop it into substantial, uneven chunks.
- Pinch of SaltThis crucial ingredient enhances all the other flavors, making the sweet and tart notes pop brilliantly.
The full ingredients list, including measurements, is provided in the recipe card directly below.
How to Make Raspberry Chocolate Chunk Ice Cream
Follow these simple steps to prepare this delicious dish:
Step 1: Prepare and Chill the Ice Cream Base
In a large bowl, whisk together the heavy cream, whole milk, granulated sugar, and vanilla bean paste until the sugar is completely dissolved. Stir in the pinch of salt. Cover the bowl tightly with plastic wrap and transfer it to the refrigerator. This base must chill thoroughly for at least 8 hours, or ideally overnight, before churning. A cold base is the non-negotiable secret to avoiding icy ice cream.
Step 2: Create the Concentrated Raspberry Purée
Combine the raspberries, 2 tablespoons of sugar, and lemon juice in a small saucepan. Heat over medium heat, stirring occasionally, until the berries break down completely and the mixture thickens slightly, about 10 minutes. Press the purée through a fine-mesh sieve set over a clean bowl to remove all the seeds. Discard the solids and chill the seedless purée in the refrigerator for at least 2 hours, ensuring it is completely cold before use.
Step 3: Churn the Ice Cream Base
Once the cream base is thoroughly chilled, pour it into your ice cream maker bowl and churn according to the manufacturer’s instructions. This usually takes between 20 and 30 minutes. The mixture should thicken considerably, resembling soft-serve ice cream when finished. The consistency should be thick enough to hold its shape but still soft enough to mix easily in the next step.
Step 4: Incorporate the Chocolate and Swirl the Raspberry
Transfer half of the freshly churned ice cream base into a large, freezer-safe container. Sprinkle half of the rough-chopped dark chocolate chunks over the top. Drizzle half of the chilled raspberry purée over the mixture. Layer the remaining ice cream base, the rest of the chocolate chunks, and the remaining raspberry purée on top. Using a knife or spoon, gently swirl the layers only a few times to create ribbons of color, being careful not to over-mix and muddy the beautiful colors.
Step 5: Harden the Raspberry Chocolate Chunk Ice Cream
Cover the container tightly with plastic wrap, pressing the wrap directly onto the surface of the ice cream to prevent freezer burn, then secure the lid. Transfer the container to the coldest part of your freezer—usually the back—and allow the ice cream to harden for at least 4 to 6 hours. This firming process is known as ‘curing’ and is essential for achieving the perfect scoopable texture of yourRaspberry Chocolate Chunk Ice Cream.
Step 6: The Moment of Sweet Victory
Before serving, let the hardened ice cream sit at room temperature for about 5 to 10 minutes to soften slightly, making it easier to scoop. Transfer to cones or bowls and drizzle with a little extra raspberry sauce if you have any leftover for the perfect finishing touch.
Troubleshooting Common Ice Cream Woes
Even seasoned dessert makers occasionally face challenges with freezing desserts, particularly when introducing fruit and large inclusions like chocolate chunks. The two most frequent issues are iciness and density. If your ice cream turns out too icy, it almost always points back to Step 1: the base wasn’t cold enough before churning, or the mix lacked sufficient fat or sugar. Ensure your ingredients, especially the cream, are ice-cold, and that you measure your sugar precisely.
If your ice cream is too dense or hard to scoop, it might be due to a faulty freezing point. Sugar is crucial for keeping frozen treats soft. If you reduced the sugar quantity in an attempt to make it less sweet, you likely raised the freezing point, causing it to freeze solid. A good tip for ultra-creamy results is to add a tablespoon of a neutral liquid sweetener, such as corn syrup or agave, to the base. While sugar prevents iciness, these thickeners help bind free water molecules, ensuring a consistently smooth texture, even after extended time in the deep freeze. Mastering this creamy frozen treat simply requires attention to temperature and measurement.
Maximizing Flavor and Texture Lifespan
Once you achieve the perfect batch ofRaspberry Chocolate Chunk Ice Cream, the goal shifts to preservation. Homemade ice cream, unlike commercial varieties, typically has a shorter shelf life before the quality begins to degrade. It is best enjoyed within two weeks. To maximize the longevity of its peak texture and flavor, store it in an airtight container that is designed specifically for the freezer. Pressing plastic wrap directly onto the surface before securing the lid creates a barrier against air, preventing freezer burn—that crystalline enemy of all good desserts.
Furthermore, avoid repeatedly moving the ice cream from the freezer to room temperature, which encourages thawing and refreezing cycles. This cycle introduces large, noticeable ice crystals and ruins the velvety mouthfeel you worked so hard to create. Instead, keep the container deep within the coldest section of your freezer, only retrieving it when you are ready to indulge in this magnificent homemade chocolate raspberry delight.
The Accidental Discovery of Sunshine on a Plate

My quest for the perfect summer treat began on a scorching afternoon, resulting in what I affectionately call “The Great Freezer Fiasco.” I had intended to make plain vanilla, but after tripping over a rogue bag of frozen raspberries and accidentally dumping half a bag of dark chocolate chips into the custard base, the glorious, tangy, and richRaspberry Chocolate Chunk Ice Creamwas born. It was pure, accidental genius.
Why This Ice Cream Is Your New Best Friend
Forget store-bought pints that taste vaguely of disappointment. This homemade delight offers a luxurious, creamy texture contrasted by bursts of tart raspberry and rich, bittersweet chocolate. It’s an easy, no-bake project that proves dessert doesn’t have to be complicated to be utterly transcendent. This is the scoop you’ll make every weekend, guaranteed.
The Science of the Perfect Swirl
Achieving that deep, fruity swirl in homemade ice cream can feel like navigating a culinary minefield. You want streaks of vibrant fruit, not an entirely pink soup. The secret lies in concentrating the raspberry flavor first. We start by gently simmering the raspberries with a touch of sugar and lemon juice until they break down into a thick, jewel-toned syrup. Straining this mixture removes the seeds, resulting in a velvety smooth consistency that won’t compromise the final texture of the frozen base.
Once the custard base is chilled and ready for churning, hold off on adding the raspberry mix until the very last few minutes. This timing is crucial. If you add it too soon, the machine will incorporate it completely, robbing you of those desirable distinct pockets of flavor. Wait until the ice cream is already thick and resembling soft-serve, then drizzle in about half of the prepared raspberry sauce slowly. The machine will do just enough mixing to create those beautiful ribbons. Save the remaining sauce for drizzling over individual servings, creating layers of flavor that sing.
Choosing Your Chocolate Weaponry
When we talk about chocolate chunks, we are not talking about those tiny, timid chips often found lurking in the baking aisle. We need bold, jagged pieces—chunks that stand up to the tanginess of the raspberry. I recommend using a high-quality dark chocolate bar, somewhere between 60% and 75% cacao. The bitterness of the dark chocolate provides the perfect counterpoint to the sweetness of the cream and the tartness of the fruit. Chop the bar roughly; uneven pieces add visual interest and textural excitement. Some pieces should be large enough to require a satisfying crunch, while others melt slightly into the base during churning, giving subtle chocolate notes throughout.
The Foundation: Rich and Creamy Base
The secret to phenomenal ice cream often lies in the quality of its foundation. We ditch the shortcuts involving condensed milk and embrace the old-fashioned, cooked custard base. While it takes a little patience, the results—an unbelievably smooth texture that resists crystallization—are well worth the effort. Start with heavy cream, whole milk, and plenty of egg yolks. The yolks are the emulsifiers, ensuring that the fat and liquid molecules bind together harmoniously. Whisking the yolks with sugar until they turn pale yellow, known as ‘ribboning,’ incorporates air and prepares them to receive the hot dairy.
Tempering the Eggs Without Tears
Tempering sounds intimidating, like something only French pastry chefs attempt, but it’s simple insurance against scrambled eggs in your sweet cream. Slowly ladle a small amount of the heated milk mixture into the sugared yolks while whisking vigorously. This gently raises the temperature of the eggs without cooking them instantly. Once you’ve added about a cup of the hot liquid, pour the warmed egg mixture back into the main saucepan of remaining dairy. Now, you can cook the custard over medium-low heat, stirring constantly with a rubber spatula until it thickens slightly and coats the back of a spoon. This method guarantees a velvety base for your frozen dessert.
The Art of Patience and Pre-Chilling
If you take one piece of advice from this entire ice cream saga, let it be this: impatience is the mortal enemy of magnificent frozen desserts. You must embrace the chill. The custard must chill completely, the ice cream bowl must chill completely, and frankly, you should probably chill completely while waiting. Rushing the process introduces warmth, and warmth leads to large, disappointing ice crystals, resulting in an ice cream that feels more like flavored snow than luxurious cream.
Once you’ve cooked the custard and it’s smoothed into a shimmering liquid, transfer it immediately to an ice bath—a large bowl filled with ice and a little water—and stir it gently until the temperature drops significantly. Then, transfer it to the refrigerator. Covering the surface directly with plastic wrap prevents a skin from forming. This rapid cooling and then slow, deep chilling guarantees the fat molecules solidify properly, ensuring that ethereal texture that makes homemade Raspberry Chocolate Chunk Ice Cream legendary. It’s an easy technique that elevates the finished product from good to jaw-droppingly great.
Ingredients for Raspberry Chocolate Chunk Ice Cream
For the Custard Base:
- 2 cups heavy cream
- 1 cup whole milk
- ¾ cup granulated sugar, divided
- 5 large egg yolks
- 1 teaspoon pure vanilla bean paste
- Pinch of fine sea salt
For the Raspberry Swirl:
- 1 ½ cups frozen or fresh raspberries
- ¼ cup granulated sugar
- 1 tablespoon fresh lemon juice
- 1 teaspoon cornstarch mixed with 2 teaspoons cold water (slurry)
For the Chocolate Chunks:
- 5 ounces high-quality dark chocolate (60-75% cacao), roughly chopped into chunks
Step-by-Step Churning Brilliance
Making ice cream is less about demanding attention and more about timing and chilling. Ensure your ice cream maker bowl has been frozen solid for at least 24 hours—this step is non-negotiable for success. Once your custard base has chilled completely in the refrigerator (ideally overnight, or at least 6 hours), it’s ready to meet the machine. Don’t rush this chilling process; a warmer base results in icy, granular ice cream.
Pour the thoroughly chilled custard into the ice cream maker and turn it on. Let it churn according to the manufacturer’s instructions, usually 20 to 30 minutes, until it reaches the consistency of soft-serve. During the last 5 minutes of churning, gradually add the rough chocolate chunks. Just before stopping the machine, drizzle in about half of the prepared, cooled raspberry swirl mixture. The machine should incorporate it minimally, creating those distinct red and white streaks that define this iconic frozen treat.
Transfer the churned mixture immediately to an airtight container. Use a spoon to gently fold in a few more spoonfuls of the remaining raspberry swirl on top for extra visual appeal. Freeze the ice cream for at least 4 hours, or until fully firm. The reward for your patience is a scoop of pure, vibrant joy that transcends standard dessert fare.
Sweet Harmony: Balancing Tartness and Sugar
The beauty of this particular ice cream flavor lies in the dynamic tension between the sweet cream and the tart raspberries. Raspberries, especially when fresh and seasonal, can carry a beautiful zing. We leverage that tartness instead of trying to mask it entirely. By using lemon juice in the raspberry swirl reduction, we intensify the natural acidity of the fruit, creating a sharp, clean contrast to the heavy, rich custard base. When enjoying a spoonful, the dark chocolate hits with bitterness, followed by the sweetness of the cream, and finally, that bright burst of raspberry—it’s a perfect flavor journey.
If you find your raspberries are particularly sweet, reduce the amount of sugar in the swirl mixture by a teaspoon or two. Conversely, if they are quite tart, you might add a touch more sugar to the custard base. Tasting as you go is essential, especially when dealing with fresh produce whose sweetness levels fluctuate based on ripeness and season. Remember, the base needs to taste slightly sweeter than you might prefer, as freezing dulls the perception of sweetness.
Perfecting the Cooking Process
Start by preparing the raspberry swirl and allowing it to cool completely; this prevents melting the custard. Next, cook the custard base until thickened, then chill it thoroughly—at least six hours—before churning. Finally, add the chocolate and swirl mix only in the last few minutes of churning for maximum texture and streak effect.
Add Your Touch
Try substituting the raspberries with cherries or blackberries for a different fruit profile. For added richness, toast the milk powder before adding it to the custard base. You can also swap dark chocolate for milk chocolate, or infuse the cream with vanilla bean pods instead of using extract for a deeper, more aromatic flavor.
Storing & Reheating
Store the ice cream in a shallow, airtight container pressed with parchment paper directly against the surface to minimize freezer burn and keep it tasting fresh. Scoop the Raspberry Chocolate Chunk Ice Cream into bowls directly from the freezer; thawing is not required. For softer texture, let it sit on the counter for five minutes before serving.
Expert Tips for Supreme Creaminess
- Use a stabilizer like a tiny amount of high-quality vegetable glycerin or locust bean gum to dramatically improve the texture and prevent icy crystal formation.
- Always strain the custard base after cooking to ensure the smoothest texture possible, catching any stray bits of cooked egg or undissolved sugar.
- Chill your base mixture overnight, not just for a few hours; the colder the base when it enters the churner, the smaller the ice crystals will be.
My niece, who usually refuses anything with fruit, tried this at a family gathering and declared it “choc-berry magic.” That endorsement alone cemented this recipe’s permanent spot in the rotation.
Conclusion for Raspberry Chocolate Chunk Ice Cream
This Raspberry Chocolate Chunk Ice Cream recipe transcends simple dessert status; it is a declaration of summer joy, packed with vibrant fruit swirls and satisfying dark chocolate crunch. We learned that patience in chilling and precision in tempering the custard are key to achieving unparalleled creaminess. Remember to integrate the chocolate chunks and raspberry swirl only during the final moments of churning to capture those distinct, gorgeous ribbons of flavor. Whether serving it to skeptical family members or hoarding it entirely for yourself, this perfectly balanced, homemade scoop is an absolute masterpiece.

Leave a Comment