
Oreo Balls Dessert: A Sweet Indulgence
Oreo Balls Dessert is a delightful treat that has captured the hearts of dessert lovers everywhere. With their rich chocolate coating and creamy filling, these bite-sized delights are perfect for any occasion, from holiday gatherings to casual get-togethers. The beauty of Oreo Balls Dessert lies not only in their taste but also in their simplicity; they require minimal ingredients and can be whipped up in no time.
Originating from the classic Oreo cookie, which has been a beloved staple since its debut in 1912, this dessert pays homage to the iconic flavor that many of us grew up enjoying. The combination of crushed Oreos and cream cheese creates a luscious filling that is both sweet and satisfying. People adore this dish for its irresistible taste and texture—each bite offers a perfect balance of crunch and creaminess.
Whether you’re looking to impress guests or simply satisfy your sweet tooth, Oreo Balls Dessert is a convenient and crowd-pleasing option. Join me as we dive into this easy recipe that promises to bring joy to your taste buds!

Ingredients:
- 1 package (15.35 oz) Oreo cookies
- 1 package (8 oz) cream cheese, softened
- 2 cups semi-sweet chocolate chips
- 1 tablespoon vegetable oil (optional, for thinning chocolate)
- Sprinkles or crushed Oreos for decoration (optional)
Preparing the Oreo Mixture
- Start by placing the entire package of Oreo cookies into a food processor. If you don’t have a food processor, you can also place the cookies in a large zip-top bag and crush them with a rolling pin.
- Pulse the cookies in the food processor until they are finely crushed and resemble a fine crumb. This should take about 30 seconds to 1 minute.
- In a large mixing bowl, combine the crushed Oreos with the softened cream cheese. Use a spatula or your hands to mix until the mixture is well combined and forms a dough-like consistency. It’s important that the cream cheese is softened to ensure it blends well with the cookie crumbs.
- Once the mixture is combined, cover the bowl with plastic wrap and refrigerate for about 30 minutes. This will make it easier to roll into balls.
Rolling the Oreo Balls
- After the mixture has chilled, remove it from the refrigerator. Using a small cookie scoop or your hands, take about 1 tablespoon of the mixture and roll it into a ball. Place the balls on a baking sheet lined with parchment paper.
- Continue rolling the mixture into balls until all of it is used. You should have about 20-25 Oreo balls, depending on the size you make them.
- Once all the balls are rolled, place the baking sheet back in the refrigerator for another 15-20 minutes to firm up.
Melting the Chocolate
- While the Oreo balls are chilling, it’s time to melt the chocolate. In a microwave-safe bowl, add the semi-sweet chocolate chips.
- Microwave the chocolate in 30-second intervals, stirring in between each interval until the chocolate is completely melted and smooth. This usually takes about 1-2 minutes total.
- If the chocolate is too thick for dipping, you can add a tablespoon of vegetable oil to thin it out. Stir well until fully combined.
Dipping the Oreo Balls
- Once the Oreo balls are firm and the chocolate is melted, it’s time to dip! Using a fork or a toothpick, dip each Oreo ball into the melted chocolate, making sure it is fully coated.
- Allow any excess chocolate to drip off before placing the dipped ball back onto the parchment-lined baking sheet.
- If you want to add sprinkles or crushed Oreos for decoration, do this immediately after dipping while the chocolate is still wet.
- Repeat the dipping process for all the Oreo balls until they are all coated in chocolate.
Chilling and Serving
- Once all the Oreo balls are dipped and decorated, place the baking sheet in the refrigerator for at least 30 minutes to allow the chocolate to set completely.
- After the chocolate has hardened, you can transfer the Oreo balls to an airtight container for storage. They can be kept in the refrigerator for up to a week.
- When you’re ready to serve, simply take them out of the fridge and enjoy! These Oreo balls are perfect for parties, holidays, or just a sweet treat at home.
Tips and Variations
- Flavor Variations: You can experiment with different flavors of Oreos, such as mint or peanut butter, to create unique Oreo balls.
- Chocolate Coating: Instead of semi-sweet chocolate, you can use white chocolate or milk chocolate for a different taste.
- Storage: For longer storage, you can freeze the Oreo balls. Just make sure to place them in a single layer in a freezer-safe container.
- Presentation: For a fancier presentation, drizzle melted chocolate over the set Oreo balls or use colored chocolate melts for decoration.
- 1 package (15.35 oz) Oreo cookies
- 1 package (8 oz) cream cheese, softened
- 2 cups semi-sweet chocolate chips
- 1 tablespoon vegetable oil (optional, for thinning chocolate)
- Sprinkles or crushed Oreos for decoration (optional)
- Start by placing the entire package of Oreo cookies into a food processor. If you don’t have a food processor, you can also place the cookies in a large zip-top bag and crush them with a rolling pin.
- Pulse the cookies in the food processor until they are finely crushed and resemble a fine crumb. This should take about 30 seconds to 1 minute.
- In a large mixing bowl, combine the crushed Oreos with the softened cream cheese. Use a spatula or your hands to mix until the mixture is well combined and forms a dough-like consistency.
- Once the mixture is combined, cover the bowl with plastic wrap and refrigerate for about 30 minutes.
- After the mixture has chilled, remove it from the refrigerator. Using a small cookie scoop or your hands, take about 1 tablespoon of the mixture and roll it into a ball. Place the balls on a baking sheet lined with parchment paper.
- Continue rolling the mixture into balls until all of it is used. You should have about 20-25 Oreo balls, depending on the size you make them.
- Once all the balls are rolled, place the baking sheet back in the refrigerator for another 15-20 minutes to firm up.
- While the Oreo balls are chilling, it’s time to melt the chocolate. In a microwave-safe bowl, add the semi-sweet chocolate chips.
- Microwave the chocolate in 30-second intervals, stirring in between each interval until the chocolate is completely melted and smooth.
- If the chocolate is too thick for dipping, you can add a tablespoon of vegetable oil to thin it out. Stir well until fully combined.
- Once the Oreo balls are firm and the chocolate is melted, using a fork or a toothpick, dip each Oreo ball into the melted chocolate, making sure it is fully coated.
- Allow any excess chocolate to drip off before placing the dipped ball back onto the parchment-lined baking sheet.
- If you want to add sprinkles or crushed Oreos for decoration, do this immediately after dipping while the chocolate is still wet.
- Repeat the dipping process for all the Oreo balls until they are all coated in chocolate.
- Once all the Oreo balls are dipped and decorated, place the baking sheet in the refrigerator for at least 30 minutes to allow the chocolate to set completely.
- After the chocolate has hardened, you can transfer the Oreo balls to an airtight container for storage.
- When you’re ready to serve, simply take them out of the fridge and enjoy!
- Flavor Variations: You can experiment with different flavors of Oreos, such as mint or peanut butter, to create unique Oreo balls.
- Chocolate Coating: Instead of semi-sweet chocolate, you can use white chocolate or milk chocolate for a different taste.
- Storage: For longer storage, you can freeze the Oreo balls. Just make sure to place them in a single layer in a freezer-safe container.
- Presentation: For a fancier presentation, drizzle melted chocolate over the set Oreo balls or use colored chocolate melts for decoration.
Conclusion:
If you’re looking for a dessert that’s not only delicious but also incredibly easy to make, then these Oreo Balls are a must-try! With just three simple ingredients, you can whip up a batch of these delightful treats that are sure to impress your family and friends. The combination of crushed Oreos and cream cheese creates a rich, creamy filling that is perfectly complemented by the chocolate coating. Each bite is a heavenly explosion of flavor that will leave you craving more.
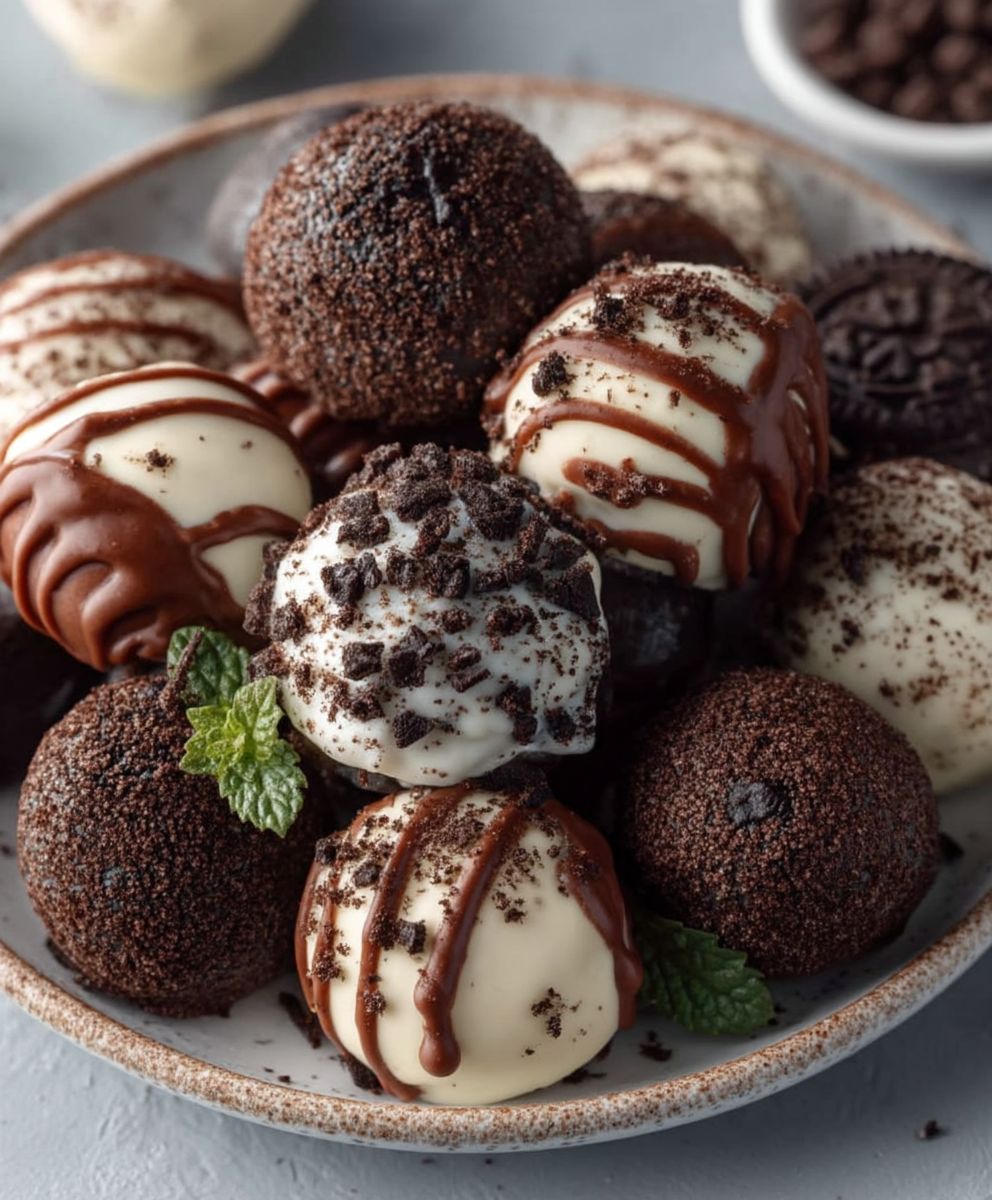
For serving suggestions, I recommend presenting your Oreo Balls on a decorative platter, perhaps garnished with a sprinkle of crushed Oreos or a drizzle of white chocolate for an extra touch of elegance. They make for a fantastic addition to any party or gathering, and they’re perfect for holidays, birthdays, or just a cozy night in. You can also get creative with variations! Try using different types of Oreos, such as mint or peanut butter, to give your Oreo Balls a unique twist. You could even roll them in crushed nuts, sprinkles, or coconut for added texture and flavor.
I encourage you to try this Oreo Balls recipe and experience the joy of making these delightful treats yourself. They are not only fun to make but also a great way to involve kids in the kitchen. Once you’ve made them, don’t forget to share your experience! I would love to hear how your Oreo Balls turned out and any creative variations you tried. You can share your photos and stories on social media, tagging your friends to inspire them to make their own batch.
In conclusion, these Oreo Balls are a simple yet indulgent dessert that everyone will love. Whether you’re serving them at a gathering or enjoying them as a sweet treat at home, they are sure to be a hit. So grab your ingredients, roll up your sleeves, and get ready to enjoy the delightful world of Oreo Balls!
Oreo Balls Dessert: A Simple and Delicious No-Bake Recipe
These no-bake Oreo Balls are a delicious treat made from crushed Oreo cookies and cream cheese, coated in rich chocolate. Perfect for parties or a sweet snack, they are easy to make and can be customized with different flavors and decorations. Enjoy these delightful bites chilled for the best taste!


Leave a Comment