
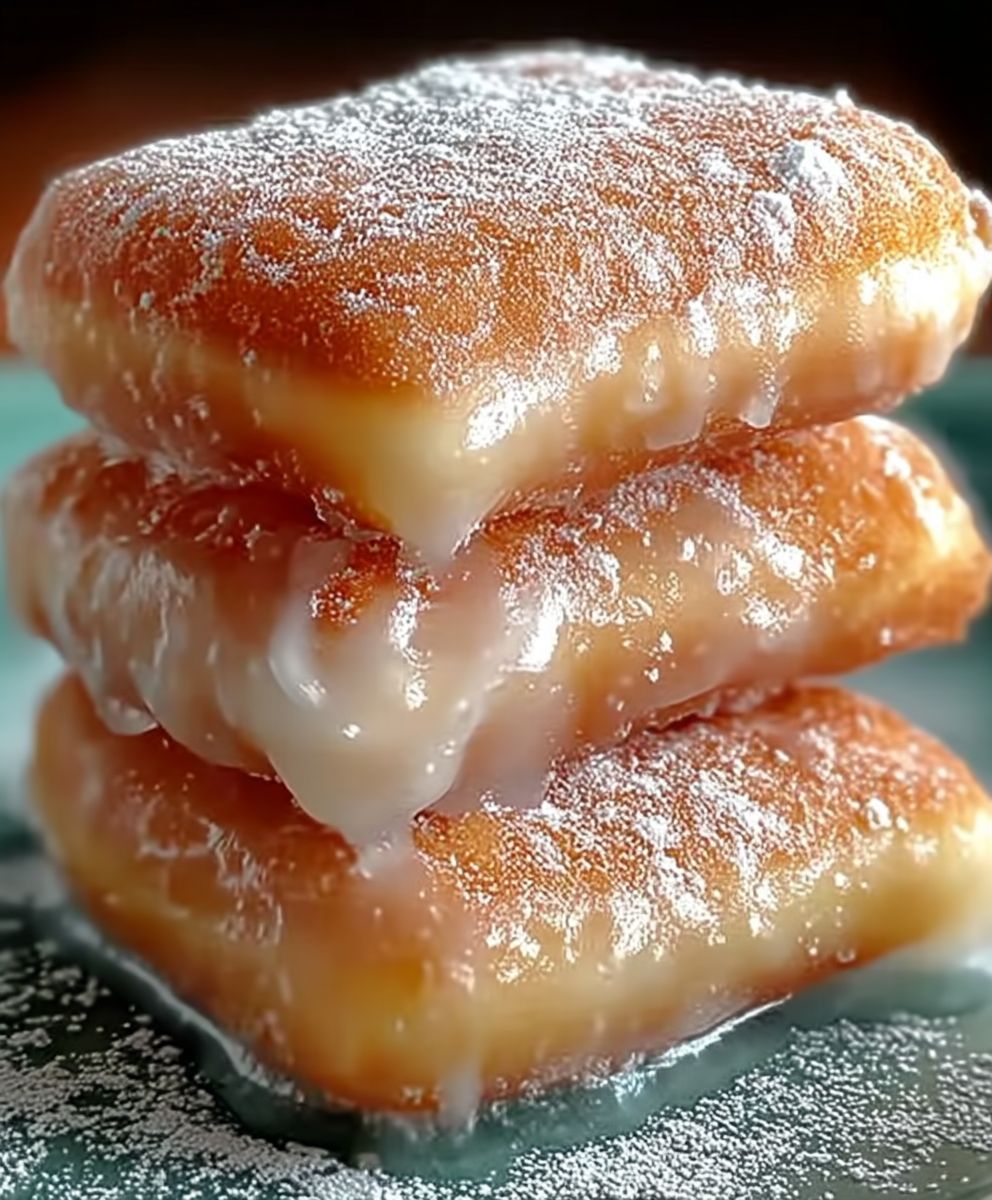
The aroma of frying dough dusted with snow-like sugar is pure magic. Forget complicated French pastry—we are diving into the delightful world of New Orleans with trueHomemade Beignets: A Step-by-Step Guide to Perfecting This Classic Treat. These puffy, golden squares are worth every single crumbly mess.
Imagine a bite that is simultaneously airy, chewy, and coated in enough powdered sugar to make your shirt look like a winter wonderland. Get ready to master this legendary confection, bringing a little bit of Louisiana café culture right into your kitchen.
- Achieve an incredibly light and airy interior texture, guaranteeing that melt-in-your-mouth experience often associated only with professional bakery sweets.
- This manageable recipe simplifies the classic yeast dough process, making delightful deep-fried perfection accessible even for novice home bakers.
- The striking visual contrast of the deeply golden, pillowy squares against a generous snowfall of bright white confectioner’s sugar is highly appealing.
- Perfect for brunch, dessert, or a late-night craving, these versatile treats pair beautifully with a strong cup of coffee or rich, spiced hot chocolate.
The Joyful Mess of Making Homemade Beignets
My first attempt at these classic treats ended up looking less like elegant pillows and more like tiny, rock-hard asteroids. I quickly learned that the secret to achieving that ethereal, cloud-like texture isn’t brute force or fancy equipment; it’s patience and respecting the yeast. Yeast is essentially a temperamental, microscopic celebrity—it needs to be warm, well-fed, and given plenty of space to breathe, or it throws a spectacular tantrum resulting in dense, sadness-inducing dough. Making beignets is a ritual. It’s a commitment to the process that results in a profound reward. If you approach this recipe correctly, your kitchen will soon smell like the happiest corner of the French Quarter, even if your actual location is slightly less glamorous.
We are aiming for a deep, golden color and an interior structure so light that it practically evaporates on the tongue. This means we must address two common pitfalls immediately: under-proofing the dough and frying at the wrong temperature. When the dough is rushed, it will refuse to puff up in the oil, leaving you with chewier, less satisfying squares. If the oil is too cool, the dough absorbs the fat, turning greasy. If the oil is too hot, the outside burns before the inside cooks, leading to a doughy, raw center. The perfect batch requires careful attention to the dough’s texture and the oil’s steady heat, turning a simple frying operation into a precise, delectable dance.
The Magic of the Yeast: Getting Your Dough to Rise
The foundation of any spectacular fried dough is the initial rise. We start by gently blooming the yeast, dissolving it in warm water with a touch of sugar. The water temperature is crucial; aim for a comfortable bath temperature, around 105–115°F (40–46°C). Too cold, and the yeast sleeps; too hot, and the yeast perishes, rendering the dough lifeless. Once the yeast mixture is foamy and smells slightly earthy, you know the magic is active and ready to work. Incorporating this mixture into the dry ingredients—flour, sugar, salt—along with softened butter and eggs, creates the rich, pliable foundation.
Kneading the dough develops the gluten structure, giving the beignet the strength to hold its airy shape during frying. Knead until the dough is smooth, elastic, and no longer sticky. Transfer the dough to a lightly oiled bowl, cover it snugly, and let it perform its rising act in a warm, draft-free place. This first rise often takes about two hours, or until the dough has doubled in size. If your kitchen is cold, consider placing the bowl near a sunny window or inside a slightly warm, turned-off oven. Patience here is non-negotiable; this waiting period directly translates into the final fluffiness of your beignets.
Handling the Dough: The Art of the Second Rest
Once the dough has doubled, gently deflate it. This step redistributes the yeast, creating a finer texture for the final product. Now, the dough enters a crucial secondary phase: chilling. Unlike other bread doughs, beignet dough benefits immensely from a minimum of four hours of refrigeration, though overnight is truly ideal. Chilling the dough makes it significantly easier to handle, roll, and cut into those signature squares. A cold dough also resists absorbing excess oil during frying, resulting in a lighter, less greasy confection.
When you are ready to fry, retrieve the dough and roll it out carefully on a lightly floured surface. Aim for a thickness of about 1/4 to 1/2 inch. Using a pizza cutter or a sharp knife, slice the dough into uniform 2-inch squares. They don’t have to be perfect—the slightly irregular shapes add to their homemade charm. As you cut the dough, transfer the squares to parchment-lined baking sheets. Crucially, let the cut squares rest for a final 15 to 20 minutes before frying. This brief final proofing allows them to relax and ensures maximum puff when they hit the hot oil, transforming them into the legendary Louisiana treats we crave.
Ingredients for Homemade Beignets: A Step-by-Step Guide to Perfecting This Classic Treat
Here’s what you’ll need to make this delicious dish:
- All-Purpose FlourThe structural backbone of the beignet; ensure it is fresh and measured correctly, preferably by weight, for consistency.
- Granulated SugarProvides food for the yeast and adds subtle sweetness to the dough, balancing the richness of the butter.
- Active Dry YeastEssential for leavening, creating those magnificent air pockets; make sure your yeast is not expired for a successful rise.
- Warm Water or MilkUsed to activate the yeast; milk adds richness, while water keeps the dough slightly lighter.
- Unsalted ButterAdds richness and tenderness to the dough structure; ensure it is softened to room temperature for easier incorporation.
- EggsAct as a binding agent and enrich the dough, contributing to color and flavor during frying.
- SaltCrucial for controlling the yeast activity and enhancing the overall flavor profile of the beignet.
- Vegetable Oil or Peanut OilUsed for deep frying; choose an oil with a high smoke point for clean, even cooking.
- Confectioner’s Sugar (Powdered Sugar)The final essential flourish; used generously for dusting these magnificent puffy squares.
The full ingredients list, including measurements, is provided in the recipe card directly below.
How to Make Homemade Beignets: A Step-by-Step Guide to Perfecting This Classic Treat
Follow these simple steps to prepare this delicious dish:
Step 1: Activate the Yeast and Mix the Dough
In a large bowl, whisk the warm water and a tablespoon of granulated sugar. Sprinkle the active dry yeast over this mixture and let it stand for 5 to 10 minutes until a foamy layer forms, indicating the yeast is active. In a separate large mixing bowl, combine the flour and salt. Add the yeast mixture, the remaining sugar, softened butter, and eggs to the flour mixture. Mix well, then turn the dough out onto a lightly floured surface and knead for about 8 to 10 minutes until the dough is smooth and elastic.
Step 2: First Rise and Chilling
Place the kneaded dough into a large bowl lightly coated with vegetable oil, turning the dough once to coat the entire surface. Cover the bowl tightly with plastic wrap or a clean kitchen towel and place it in a warm spot for approximately 2 hours, or until the dough has doubled in size. Once doubled, punch down the dough gently to deflate the air, then recover the bowl and refrigerate for a minimum of 4 hours, or preferably overnight, for best handling and flavor development.
Step 3: Roll, Cut, and Final Proofing
Remove the chilled dough from the refrigerator and roll it out onto a lightly floured surface until it reaches a uniform thickness of about 1/4 inch. Using a pizza cutter or sharp knife, cut the dough into approximately 2-inch squares. Transfer the cut squares to baking sheets lined with parchment paper. Cover the beignet squares loosely with a clean towel and allow them to rest and slightly puff up for 15 to 20 minutes before frying.
Step 4: Prepare the Frying Oil
Pour enough vegetable or peanut oil into a heavy-bottomed pot or Dutch oven to reach a depth of about 2 to 3 inches. Heat the oil slowly over medium heat until it reaches a consistent temperature of 360°F (182°C). Use a deep-fry thermometer to monitor the temperature accurately, as maintaining the heat is critical for achieving a light, non-greasy texture. If the oil temperature drops too low, fry fewer beignets per batch.
Step 5: Frying the Beignets
Carefully drop 4 to 6 beignet squares into the hot oil, ensuring not to overcrowd the pot. The dough should immediately begin to puff and float. Fry for 1 to 2 minutes per side until they achieve a deep golden brown color. Use tongs or a slotted spoon to flip them gently. Once perfectly golden, transfer the freshly fried beignets to a wire rack lined with paper towels to drain any excess oil. Maintain the oil temperature between batches.
Step 6: The Famous Sugar Dusting
Immediately after draining, while the beignets are still hot, transfer them to a bowl filled generously with confectioner’s sugar. Toss them gently to coat every surface completely with the powdered sugar, ensuring a thick, delightful blanket. If you prefer, you can use a fine-mesh sieve to dust the sugar over the entire platter once arranged.
Transfer to plates and serve immediately, alongside a steaming cup of dark roast coffee or rich hot cocoa for the perfect finishing touch.
The first time I attempted to make beignets, it was 2 AM, fueled purely by a mixture of deep-seated caffeine dependency and a bizarre documentary about New Orleans jazz. I thought, “How hard can deep-fried clouds be?” Turns out, if you treat yeast with the same cavalier attitude you reserve for assembling flat-pack furniture, things go spectacularly wrong. My first batch resembled crunchy, beige hockey pucks, dense enough to use as doorstops, and they certainly didn’t harbor the soul-soothing fluffiness I craved.
I almost gave up, but the haunting memory of properly light, powdered-sugar-dusted perfection kept calling me back. After weeks of experimentation, adjusting temperatures, battling rogue dough, and occasionally showering my kitchen with confectionery sugar, I finally cracked the code. These aren’t just fried dough squares; they are airy miracles, demanding attention and respect, but rewarding you with the kind of buttery, yeasty warmth that makes you want to spontaneously adopt a brass band. This guide isn’t just about a recipe; it’s about achieving that blissful, pillowy texture that transforms a standard Sunday morning into a full-blown culinary pilgrimage. If you follow these steps closely, you can skip the hockey puck phase and jump straight to the ecstasy.
The Essential Ingredients for True Pillows of Delight
Making spectacular beignets starts with using the right components, primarily focusing on creating a rich, elastic dough that is ready to puff into oblivion when kissed by hot oil. Don’t cheap out on the dairy; whole milk provides the necessary fat content that keeps the dough tender and prevents it from drying out during proofing.
Building the Beignet Base
You’ll notice this recipe uses yeast. This isn’t a quick-bread doughnut situation; we are aiming for classic New Orleans airy goodness, which requires patience and active dry yeast. Ensure your yeast is fresh—if it doesn’t foam up when mixed with warm liquid, ditch it and buy new supplies. Nobody wants lazy dough.
- The Wet Ingredients:Warm whole milk, granulated sugar (for the yeast), and unsalted butter (melted).
- The Dry Ingredients:All-purpose flour, active dry yeast, a pinch of salt (critical for balancing the sweetness), and nutmeg (optional, but highly recommended for depth).
- The Frying Oil:Vegetable oil, canola oil, or peanut oil are ideal because they have high smoke points. Temperature consistency is non-negotiable here.
- The Finishing Touch:Mountains of sifted powdered sugar. Seriously, use more than you think is necessary.
The secret weapon here is sometimes a splash of vinegar or lemon juice mixed into the milk if you want a slight tang that cuts through the richness, acting similarly to buttermilk without needing a full swap. This small acidic addition also helps tenderize the dough further, ensuring maximum fluffiness.
The Accidental Discovery of Sunshine on a Plate

I first tasted a true beignet after getting hopelessly lost walking through the French Quarter. Suddenly, the scent of hot dough and sugar hit me like a revelation. Biting into that light, golden square was an unexpected joy, a moment of pure, powdered-sugar-dusted delight that I knew I had to recreate back home, despite the inherent risk of kitchen chaos.
Kneading, Resting, and Rolling: The Road to Fluffiness
The most time-consuming part of preparingHomemade Beignets: A Step-by-Step Guide to Perfecting This Classic Treatis the waiting. Patience is truly the key ingredient, primarily because you need that dough to relax, expand, and develop flavor. Skipping the required resting time results in tough, chewy squares—a tragedy we must avoid.
Step 1: Activating the Yeast and Forming the Dough
In a large bowl, dissolve the yeast and a teaspoon of sugar in the warm milk (ensure the temperature is around 105-115°F, or comfortably warm to the touch). Let it stand for about 10 minutes until foamy. This is the yeast waking up and preparing to work its magic. Once foamy, stir in the rest of the sugar, melted butter, and salt. Gradually add the flour, mixing until a shaggy dough forms. Turn the dough out onto a lightly floured surface and knead for about 5 to 7 minutes until smooth and elastic. It should spring back slowly when poked.
Step 2: The Critical First Rise
Place the kneaded dough in a lightly oiled bowl, turning it once to coat. Cover the bowl tightly with plastic wrap or a damp kitchen towel. Let the dough rise in a warm, draft-free spot until doubled in size, which usually takes about 1.5 to 2 hours, depending on the warmth of your kitchen. If your kitchen is cold, turn your oven on low for a minute, then turn it off and let the dough rise inside (oven door slightly ajar).
Step 3: Rolling and Cutting the Signature Shape
Gently punch down the risen dough to release the air—this is essential for even texture. Turn the dough out onto a floured surface. Roll the dough into a large rectangle about 1/4 inch thick. Precision matters here; thin dough results in crispy edges, while thick dough results in dense centers. Using a sharp knife or pizza cutter, cut the dough into 2.5-inch squares. Don’t worry about perfection; those odd shapes are charming.
Step 4: The Short Second Proof
Arrange the squares on parchment-lined baking sheets, leaving a small space between them. Cover them loosely and let them rest for a final 15 to 20 minutes. This short rest allows the gluten to relax one last time before frying, ensuring maximum puff factor. Do not skip this brief rest; it’s the difference between merely fried dough and fluffy beignet perfection.
Perfecting the Cooking Process
Always ensure your frying oil reaches and maintains 350°F (175°C) before dropping in the dough. Prepare your dredging area—a tray lined with paper towels and your sifter full of powdered sugar—while the oil heats up. Fry the squares in small batches to avoid overcrowding and dropping the oil temperature, guaranteeing uniform golden brown results.
Frying for Optimal Puff
The moment of truth arrives when those little dough squares hit the hot oil. They should immediately begin to bubble and puff up. Fry the beignets for about 45 seconds to 1 minute per side until they are golden brown. They cook incredibly fast, so watch them closely—distraction will lead to disaster. Use a spider or slotted spoon to turn them and remove them promptly when done.
Immediately transfer the hot, drained beignets to your paper towel-lined tray to absorb any excess oil. The faster you get them out, the less likely they are to become greasy. Then, and this is the most crucial part, you must coat them while they are steaming hot. If you wait even two minutes, the powdered sugar won’t adhere properly, and you’ll end up with naked, sad little squares.
Add Your Touch
While tradition dictates a simple dusting of powdered sugar, feel free to customize. Try incorporating a teaspoon of cinnamon or cardamom into the dry ingredients for a spiced note, or serve them with a simple berry reduction or caramel dipping sauce for added decadence and complexity.
If you enjoy a stronger flavor, substitute a quarter of the all-purpose flour with bread flour; this increases the gluten slightly, giving you a chewier interior while maintaining that crucial airiness. Alternatively, for a slightly richer color and flavor, swap out some of the whole milk for heavy cream. For a truly unique twist, serve them alongside a homemade, thick chocolate dipping sauce instead of standard coffee accompaniment.
Storing & Reheating
Beignets are best eaten immediately—that’s just a universal law of fried dough. However, if you must save leftovers, store them uncovered at room temperature for maximum one day. Reheat briefly in a 350°F oven for 5 minutes, then re-dust them generously with fresh powdered sugar right before serving to recapture some of their initial magic.
Expert Beignet Tips from the Kitchen Trenches
-
Use a deep-fry thermometer religiously; oil that is too cool results in greasy dough, and oil that is too hot burns the exterior before the inside cooks through.
-
When rolling the dough, strive for uniform thickness (1/4 inch is perfect) to ensure all the beignets puff up and cook evenly in the frying oil simultaneously.
-
Sift your powdered sugar over the beignets while they are piping hot; the steam helps the sugar stick, creating that signature, generous white coating.
The biggest compliment I ever received was when my neighbor, who grew up near New Orleans, tasted these and closed her eyes, declaring, “It tastes like home.” That’s the feeling we aim for.
Conclusion for Homemade Beignets: A Step-by-Step Guide to Perfecting This Classic Treat
Mastering the art ofHomemade Beignets: A Step-by-Step Guide to Perfecting This Classic Treatinvolves respecting the yeast, controlling the oil temperature, and prioritizing patience during the proofing stages. From the initial mixing of the rich, buttery dough to the glorious moment they balloon in the fryer, every step contributes to achieving that quintessential light, airy texture.
Remember that the key difference between tough fried squares and truly exceptional powdered sugar pillows lies in temperature control and proper resting time. By following this meticulous process and applying the expert tips for rolling and dusting, you can recreate the magic of the French Market right in your own kitchen. Prepare for a blissful mess of powdered sugar and enjoy these iconic treats while they are still warm.


Leave a Comment