
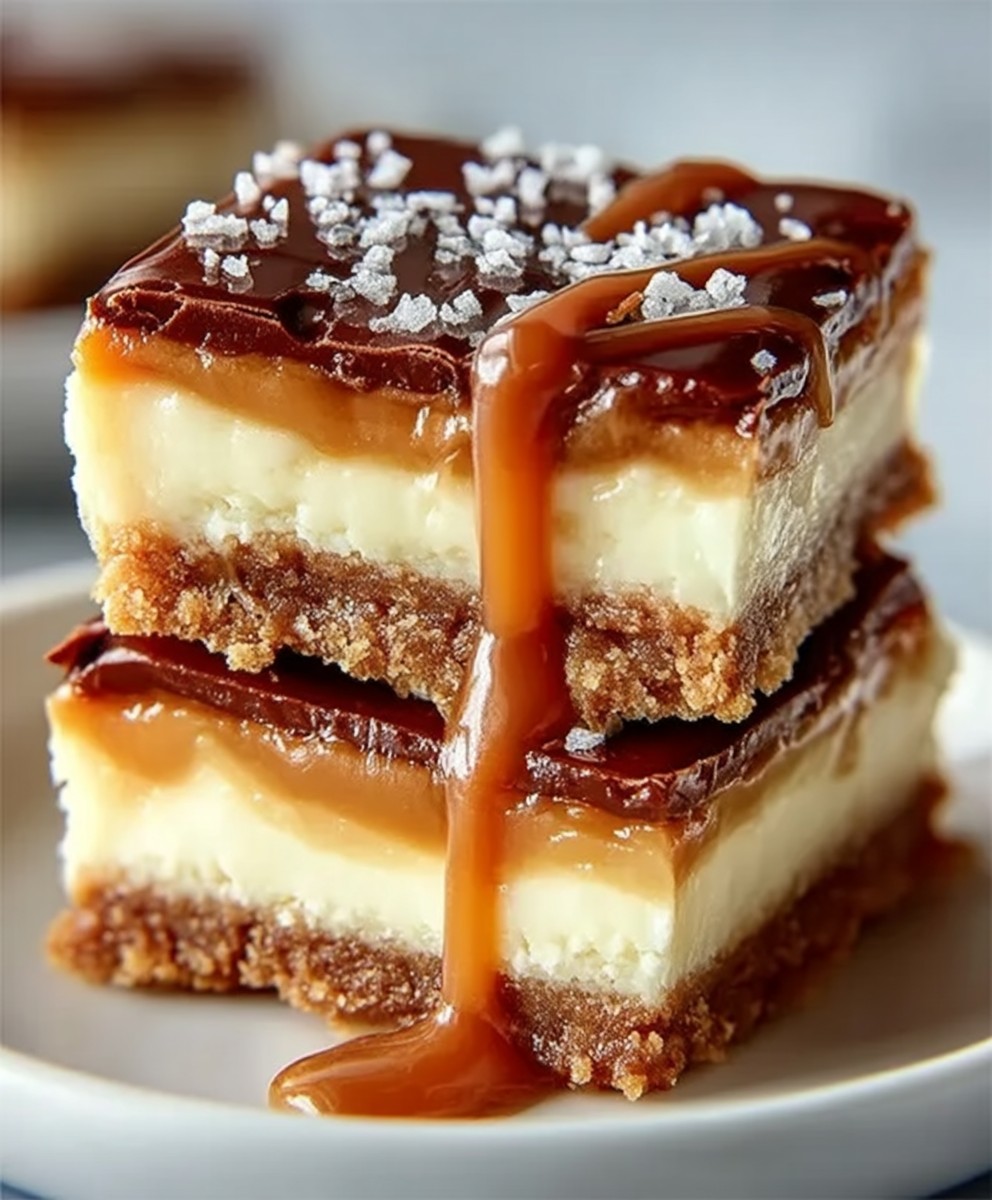
Remember that time you needed a hug, but in dessert form? These Dulce de Leche Cheesecake Bars are precisely that—a creamy, dreamy embrace for your taste buds, swirling with rich, golden caramel.
Imagine the delightful chaos of a family gathering, everyone eagerly reaching for a slice of this irresistible treat. They’re a celebration in every single bite, a true creamy caramel dream dessert recipe come to life.
- Effortless Elegance:Achieve bakery-worthy dessert status with surprisingly little fuss, making you look like a culinary genius without breaking a sweat.
- Harmonious Flavors:Experience the perfect symphony of tangy cream cheese beautifully intertwined with sweet, luxurious dulce de leche.
- Visually Stunning:Each bar boasts a gorgeous, marbled caramel swirl, promising a feast for the eyes before the first delicious bite.
- Crowd-Pleasing Versatility:Ideal for potlucks, parties, or a quiet night in, these bars are always the star of any dessert table.
Ingredients for Dulce de Leche Cheesecake Bars | Creamy Caramel Dream Dessert Recipe
Here’s what you’ll need to make this delicious dish:
- Graham Cracker CrumbsProvide the essential crunchy base for our cheesecake bars, creating a delightful contrast to the creamy filling and ensuring a sturdy foundation.
- Unsalted ButterBinds the crust ingredients together, adding a rich, buttery flavor and ensuring a firm, golden-brown foundation for the bars.
- Granulated SugarSweetens both the crust and the cheesecake filling, balancing the tanginess of the cream cheese perfectly and enhancing overall sweetness.
- Cream CheeseThe star of the show, delivering that signature tangy, smooth, and utterly decadent cheesecake texture. Choose full-fat for the best, most luxurious results.
- Dulce de LecheThe glorious caramel element, providing a deep, milky sweetness and a beautiful swirled appearance. Ensure it’s thick enough to swirl but still pourable.
- Large EggsAct as a binder, giving the cheesecake its structure and contributing to its rich, custardy consistency when baked. Use room temperature eggs for better mixing.
- Vanilla PowderEnhances all the flavors, adding a warm, aromatic depth that complements both the cheesecake and the dulce de leche beautifully.
- All-Purpose FlourA small amount is added to the cheesecake filling to prevent cracking and ensure a smooth, stable texture that holds its shape.
- Fresh Lemon JuiceBrightens the cream cheese mixture, cutting through the richness and adding a subtle, refreshing zest that elevates the flavor profile.
The full ingredients list, including measurements, is provided in the recipe card directly below.
How to Make Dulce de Leche Cheesecake Bars | Creamy Caramel Dream Dessert Recipe
Follow these simple steps to prepare this delicious dish:
- Step 1: Prepare the CrustPreheat your oven to 350°F (175°C). In a medium bowl, combine the graham cracker crumbs, melted unsalted butter, and a tablespoon of granulated sugar. Press this mixture firmly and evenly into the bottom of a 9×13-inch baking pan lined with parchment paper, allowing some overhang on the sides for easy removal later. Bake for 8-10 minutes until lightly golden and fragrant.
- Step 2: Mix the Cheesecake FillingWhile the crust bakes and cools slightly, begin preparing the filling. In a large mixing bowl, beat the softened cream cheese with the remaining granulated sugar using an electric mixer until the mixture is completely smooth and creamy with no lumps. Add the large eggs one at a time, mixing well after each addition, but be careful not to overmix, as this can introduce too much air. Stir in the vanilla powder, all-purpose flour, and fresh lemon juice until just combined.
- Step 3: Assemble and SwirlPour the prepared cheesecake filling evenly over the par-baked graham cracker crust in the pan. Next, drop spoonfuls of dulce de leche randomly over the surface of the cheesecake mixture. Do not fret about perfect placement. Using a butter knife, a skewer, or a toothpick, gently swirl the dulce de leche into the cheesecake filling to create a beautiful, marbled pattern. Avoid over-swirling to keep distinct caramel and cream cheese layers.
- Step 4: Bake to PerfectionCarefully place the pan in the preheated oven and bake for 30-35 minutes, or until the edges of the cheesecake are set and appear slightly puffed, while the center still has a slight, gentle jiggle when the pan is lightly shaken. It’s crucial not to overbake, as this can lead to cracks.
- Step 5: Chill and SliceRemove the dulce de leche cheesecake bars from the oven and let them cool completely on a wire rack at room temperature. Once they have reached room temperature, transfer the pan to the refrigerator and chill for at least 4 hours, or preferably overnight. Chilling is essential for the bars to set properly, develop their full flavor, and allow for clean, easy slicing.
Transfer to a serving platter and slice into individual bars, ready to delight your guests with their creamy caramel dreaminess.
Why These Creamy Caramel Bars Are Your New Obsession
Let’s be honest, there are desserts, and then there are DESSERTS. These creamy caramel bars fall squarely into the latter category. Imagine a dessert so utterly delightful, so perfectly balanced in its sweetness and tang, that it causes a small, polite riot at every gathering. That’s precisely what you sign up for with these fantastic treats. The journey of crafting them is surprisingly simple, yet the payoff feels incredibly gourmet. They possess that magical quality of feeling both incredibly fancy and wonderfully comforting all at once, making them a universal crowd-pleaser.
A Journey to Caramel Bliss
The star of our show, dulce de leche, isn’t just a sauce; it’s a luscious experience. This caramelized milk concoction brings a depth of flavor that ordinary caramel can only dream of. Its rich, slightly toasted sweetness pairs exquisitely with the bright, tangy notes of the cream cheese, creating a dynamic duo that keeps your taste buds dancing. Every bite of these bars offers a smooth, creamy texture that melts in your mouth, followed by the satisfying crunch of the graham cracker crust. It’s a texture party you’ll want an invitation to over and over again.
Mastering Your Cheesecake Bar Bake
Even though these Dulce de Leche Cheesecake Bars are remarkably forgiving, a few seasoned tips can elevate your baking from “good” to “legendary.” Achieving that perfect, crack-free top and an ideal swirl is simpler than you might think. Remember, baking is as much an art as it is a science, but with these pointers, you’ll be a certified dessert wizard in no time. Don’t rush the cooling process, as patience truly yields the most pristine bars. Cold ingredients for the filling are a no-go; let your cream cheese and eggs come to room temperature for the smoothest batter.
Achieving that Silky Smooth Texture
The secret to a silky smooth cheesecake texture lies in a few key steps. First, ensure your cream cheese is at room temperature before you start mixing; cold cream cheese leads to lumpy batter. Beat the cream cheese and sugar until truly smooth before adding other ingredients. When incorporating eggs, add them one at a time and mix just until combined. Overmixing introduces too much air, which can cause the cheesecake to puff up in the oven and then crack as it cools. Gentle mixing is the path to perfection.
The Art of the Dulce de Leche Swirl
Creating that mesmerizing marbled effect in your creamy caramel dream dessert is easier than it looks. The trick is to not overthink it. Once you’ve dolloped your dulce de leche onto the cheesecake batter, take a butter knife or skewer and make broad, sweeping S-shapes or figure-eights. Don’t dig too deep, as you want the swirl to remain on the surface. A few deliberate passes are all you need. Resist the urge to keep swirling; less is definitely more when it comes to elegant caramel designs.
Unleash Your Inner Dessert Artist: Variations and Ideas
While the classic Dulce de Leche Cheesecake Bars are magnificent on their own, there’s always room for a little creative flair. Think of this recipe as a canvas, ready for your personal touch. Whether you’re craving extra crunch, a burst of fruitiness, or a different layer of richness, these variations can transform your creamy caramel dream dessert into an entirely new experience. Don’t be afraid to experiment; the beauty of baking is in making a recipe truly your own. Just be mindful of maintaining the core balance of flavors.
Nutty Additions and Toppings
For those who love a bit of crunch, consider incorporating finely chopped pecans, walnuts, or even macadamia nuts into your graham cracker crust for an extra layer of texture and flavor. After baking, a sprinkle of toasted nuts over the top of the cooled bars also adds an elegant finish and a delightful bite. Alternatively, a drizzle of melted dark chocolate or a dusting of cocoa powder can provide a sophisticated counterpoint to the sweetness of the dulce de leche. These additions truly elevate the overall experience.
Flavor Twists for Dulce de Leche Cheesecake Bars
Want to introduce another flavor dimension? A hint of cinnamon or a pinch of cardamom in the crust can add a warm, inviting spice. For the cheesecake filling itself, a tablespoon of orange zest or a few drops of almond paste can introduce subtle complexity. You could even swirl in a berry compote (made with agar-agar for thickness, of course!) alongside the dulce de leche for a sweet-tart surprise. The possibilities are vast when it comes to customizing this creamy caramel dream dessert recipe.
Storing Your Sweet Success
Once you’ve mastered these irresistible treats, you’ll want to make sure they stay fresh and delicious for as long as possible. Proper storage is key to maintaining their creamy texture and vibrant flavors. These bars are excellent for making ahead, which is a huge plus when you’re planning for parties or just want to have a delightful dessert on hand for those spontaneous sweet cravings. Always keep them chilled to ensure food safety and the best enjoyment. A little foresight ensures every bite is as good as the first.
To store your cheesecake bars, simply place them in an airtight container in the refrigerator. They will keep beautifully for up to 4-5 days. For longer storage, these bars freeze exceptionally well. Wrap individual bars tightly in plastic wrap, then place them in a freezer-safe bag or container. They can be frozen for up to 2 months. Thaw them in the refrigerator overnight before serving for the best texture.
Common Questions About This Dreamy Dessert
Baking can sometimes bring up a few queries, especially when striving for perfection. Here are answers to some of the most frequently asked questions about making these delightful creamy caramel dream dessert bars, ensuring your baking journey is smooth and satisfying. Knowing the answers to these common concerns can help you troubleshoot issues before they even arise and bake with confidence, leading to consistently perfect results every single time.
Can I use store-bought dulce de leche?
Absolutely! Using good quality store-bought dulce de leche is perfectly fine and highly recommended for convenience. Many brands offer excellent versions that will work wonderfully in this Dulce de Leche Cheesecake Bars recipe. Just ensure it has a thick but still spreadable consistency for the best swirling effect.
How do I know when my cheesecake bars are done baking?
The cheesecake bars are done when the edges are set and slightly puffed, but the very center still has a slight, gentle jiggle when you gently shake the pan. They will continue to set as they cool. Overbaking can lead to a dry texture and cracks, so err on the side of underbaking slightly.
Can these cheesecake bars be frozen?
Yes, these Dulce de Leche Cheesecake Bars freeze very well! Once completely cooled, cut them into individual bars. Wrap each bar tightly in plastic wrap, then place them in a freezer-safe container or bag. They can be stored in the freezer for up to two months. Thaw them in the refrigerator before serving.
The Quest for the Ultimate Caramel Dream Dessert
There are desserts, and then there are DESSERTS. The kind that make you close your eyes, hum a little tune, and forget, just for a moment, that laundry exists. Today, my friends, we embark on a culinary journey to create one such masterpiece: the glorious Dulce de Leche Cheesecake Bars. Forget complicated pastries or finicky soufflés; these bars are your passport to pure, unadulterated sweet bliss. Imagine a buttery, crunchy graham cracker crust, a velvety smooth cream cheese filling, and then, the star of the show, swirls of rich, golden dulce de leche, all baked into irresistible squares of happiness. It’s less a recipe and more a declaration of love for all things decadent and delightful.
My kitchen has seen its share of dessert disasters, from cakes that resembled sad hockey pucks to cookies that mysteriously disappeared before cooling (don’t look at me!). But these Dulce de Leche Cheesecake Bars? They’re practically foolproof, even for the most domestically challenged among us. They arrive like a superhero, swooping in to save your potluck reputation or simply brighten a Tuesday afternoon. The first time I served them, my notoriously picky uncle actually asked for the recipe. That, my friends, is when you know you’ve struck gold. It’s not just a dessert; it’s an experience, a creamy caramel dream dessert recipe that promises to be a crowd-pleaser every single time.
Gathering Your Sweet Arsenal: Ingredients for Dulce de Leche Cheesecake Bars
Before we dive into the delicious details, let’s make sure our pantry is properly stocked. Think of these as your essential tools for building a monument of flavor. Don’t worry, nothing here is obscure or requires a secret handshake to acquire. Just good, honest ingredients ready to transform into something truly spectacular. Remember, quality ingredients make for a superior dessert, so opt for the good stuff where you can!
For the Buttery Graham Cracker Crust:
- 1 ½ cups (about 10 full sheets) graham cracker crumbs
- ¼ cup granulated sugar
- ½ cup unsalted butter, melted
For the Silky Cheesecake Filling:
- 3 (8-ounce) blocks full-fat cream cheese, softened
- ¾ cup granulated sugar
- 2 large eggs
- 1 teaspoon vanilla powder
- ¼ cup sour cream or full-fat plain Greek yogurt (adds tang and creaminess)
For the Irresistible Dulce de Leche Swirl:
- 1 (13.4-ounce) can dulce de leche (store-bought is perfectly fine, or homemade if you’re feeling ambitious!)
The Grand Baking Adventure: Crafting Your Creamy Caramel Dream Dessert Recipe
Alright, ovens preheated and spirits high! This is where the magic happens. Follow these steps, and you’ll soon be basking in the glory of your own homemade Dulce de Leche Cheesecake Bars. We’ll tackle this in stages, ensuring each layer is perfect before moving on to the next. Patience is a virtue, especially when it leads to a dessert this good.
Prepping Your Stage: The Crust Foundation
Every great building needs a strong foundation, and your cheesecake bars are no exception. The crust is simple, crunchy, and utterly delicious.
- Preheat your oven to 325°F (160°C). Line a 9×13-inch baking pan with parchment paper, leaving an overhang on the sides. This makes lifting the bars out much easier later. Consider it your dessert parachute.
- In a medium bowl, combine the graham cracker crumbs and granulated sugar. Mix them well, like they’re old friends reuniting.
- Pour in the melted butter and stir until the crumbs are evenly moistened. It should look like wet sand, ready for building.
- Press the mixture firmly and evenly into the bottom of the prepared baking pan. Use the bottom of a flat glass or a measuring cup to get a nice, compact crust. Bake for 10-12 minutes, or until lightly golden.
- Remove the crust from the oven and set it aside to cool slightly while you prepare the filling. Keep the oven on!
Whipping Up the Velvety Filling
Now for the star of the show – the cheesecake filling. This is where we aim for that perfectly smooth, rich, and creamy texture that melts in your mouth.
- In a large mixing bowl, using an electric mixer, beat the softened cream cheese on medium speed until smooth and creamy, about 2-3 minutes. Make sure there are no lumps; nobody wants a lumpy cheesecake!
- Gradually add the granulated sugar, beating until fully incorporated and the mixture is light and fluffy. Scrape down the sides of the bowl as needed to ensure everything gets mixed.
- Beat in the eggs one at a time, mixing just until each egg is combined. Overmixing eggs can introduce too much air, leading to cracks in your cheesecake. We’re aiming for smooth, not frothy.
- Stir in the vanilla powder and sour cream (or Greek yogurt) until just combined. The sour cream adds a lovely tang that balances the sweetness and contributes to that dreamy texture.
- Pour the cheesecake filling over the slightly cooled crust in the baking pan. Smooth the top with a spatula to create an even layer.
The Glorious Dulce de Leche Swirl
Here’s where we add the “caramel dream” part to our dessert. The dulce de leche swirl is both beautiful and utterly delicious.
- Dollop spoonfuls of dulce de leche randomly over the top of the cheesecake filling. Don’t be shy!
- Using a knife or a skewer, gently swirl the dulce de leche into the cream cheese filling. Create elegant patterns, or go wild – it’s your masterpiece! Don’t over-swirl, or you’ll lose the distinct layers. A few confident strokes are all you need.
Baking to Golden Perfection
The final step before the waiting game begins! Baking these bars to perfection ensures they set beautifully.
- Carefully place the baking pan in the preheated oven. Bake for 35-45 minutes, or until the edges are set and lightly golden, but the center still has a slight jiggle when you gently shake the pan. This jiggle indicates that it’s perfectly cooked through without being overbaked.
- Turn off the oven, crack the door open slightly, and let the cheesecake bars cool in the oven for about an hour. This gradual cooling helps prevent cracking.
- Remove from the oven and cool completely on a wire rack. Once fully cooled, cover the pan with plastic wrap and refrigerate for at least 4 hours, or preferably overnight. Chilling is crucial for a firm, sliceable bar.
- Once thoroughly chilled, use the parchment paper overhang to lift the entire cheesecake slab out of the pan. Place it on a cutting board and slice into bars using a sharp, warm knife. Enjoy your Dulce de Leche Cheesecake Bars!
Perfecting the Cooking Process

For optimal results, prepare the crust first and let it cool slightly while you mix the filling. This two-step process ensures your crust is perfectly baked and won’t get soggy. Once baked, cooling the cheesecake gradually in the oven prevents those dreaded cracks, yielding a pristine finish.
Add Your Touch
Feel free to get creative! Add a sprinkle of sea salt flakes over the dulce de leche swirl for a delightful salty-sweet contrast. A drizzle of melted chocolate or a sprinkle of toasted pecans on top after chilling would also elevate these bars, adding another layer of texture and flavor.
Storing & Reheating
Store these delectable Dulce de Leche Cheesecake Bars in an airtight container in the refrigerator for up to 5 days. For longer storage, wrap individual bars tightly and freeze for up to 2 months. Thaw frozen bars in the refrigerator overnight before serving for the best texture.
My grandmother once declared that these were “better than her own homemade apple pie,” which, coming from her, was the highest possible praise. It was at a family gathering, and the bars disappeared so fast, I barely got a second piece!
- Don’t Overmix the Filling:Beat cream cheese and sugar until smooth, then add eggs just until combined. Overmixing introduces too much air, which can cause cracks in your beautiful cheesecake. Gentle is the key!
- Chill, Chill, Chill:Seriously, resist the urge to cut into these too soon. A minimum of 4 hours, or better yet, overnight in the fridge, allows the cheesecake to firm up perfectly for clean, gorgeous slices.
- Warm Your Knife:For perfectly clean cuts, run your knife under hot water, wipe it dry, and then slice. Repeat this for each cut to achieve those bakery-worthy, neat edges every single time.
FAQs: Your Burning Cheesecake Queries Answered
Can I make dulce de leche from scratch?
Absolutely! You can make dulce de leche by simmering a can of sweetened condensed milk in a pot of water for 2-3 hours, ensuring the can stays fully submerged. Alternatively, you can bake it in the oven. Just be sure to let it cool completely before using.
How do I prevent my cheesecake from cracking?
To prevent cracks, ensure all ingredients are at room temperature. Don’t overmix the batter once eggs are added, and cool the cheesecake gradually. Leaving it in the turned-off oven with the door ajar for an hour helps with a slow temperature transition.
What’s the best way to cut these bars cleanly?
For clean cuts, always ensure the cheesecake bars are thoroughly chilled. Use a long, sharp knife. For each cut, dip the knife in hot water, wipe it clean, and then make a swift, clean slice. Clean the knife between each cut.
Can I use a different type of crust?
Certainly! While graham cracker is classic, you can experiment with other crumb crusts. Vanilla wafers, digestive biscuits, or even shortbread cookies crushed finely can make excellent alternatives, offering a slightly different flavor profile to your creamy caramel dessert.
There you have it, fellow dessert enthusiasts! A recipe that’s as fun to make as it is to devour. These Dulce de Leche Cheesecake Bars are more than just a sweet treat; they’re a testament to the joy of baking and sharing deliciousness. So go forth, bake, and revel in the creamy caramel dream dessert recipe you’ve just mastered. Your taste buds, friends, and family will thank you profusely, perhaps even with dramatic applause. Happy baking!
Conclusion for Dulce de Leche Cheesecake Bars | Creamy Caramel Dream Dessert Recipe
So there you have it, folks! We’ve journeyed through the delightful process of creating the most incredible Dulce de Leche Cheesecake Bars | Creamy Caramel Dream Dessert Recipe. These aren’t just any dessert. They’re a ticket to a blissful, caramel-infused paradise. Achieving this is surprisingly simple. With their velvety cheesecake base, sweet dulce de leche swirls, and sturdy graham cracker crust, these bars promise to be the star of any gathering. They are also perfect for a quiet evening in. Don’t hesitate to whip up a batch. Treat yourself and your loved ones to this utterly irresistible creamy caramel dream. Your taste buds will thank you!
FAQs
How can I ensure my Dulce de Leche Cheesecake Bars have that irresistible, creamy texture?
Achieving the perfect creamy texture in your Dulce de Leche Cheesecake Bars | Creamy Caramel Dream Dessert Recipe is all about temperature and mixing. Make sure your cream cheese is completely softened to room temperature. This prevents lumps and ensures a smooth batter. Overmixing incorporates too much air, which leads to cracks, so mix until just combined. A gentle water bath during baking also works wonders. It provides a humid environment that helps the cheesecake bake evenly and stay wonderfully smooth. Patience is key when cooling. Sudden temperature changes can affect the texture, so let it cool slowly on the counter before chilling.
Can I prepare these Creamy Caramel Dream Dessert Recipe bars ahead of time for an event?
Absolutely! These delightful Dulce de Leche Cheesecake Bars | Creamy Caramel Dream Dessert Recipe are fantastic make-ahead treats. This is great news for any busy baker. You can bake and assemble them up to two days in advance. Once fully chilled and set, cover the pan tightly with plastic wrap. Alternatively, transfer the cut bars to an airtight container. Store them in the refrigerator, and they’ll be ready to impress your guests with their luscious, creamy goodness. Chilling them overnight often enhances their flavor and firms up the texture beautifully, making them even more enjoyable.
What’s the secret to achieving perfectly distinct swirls in your cheesecake?
Creating that stunning swirl on your Creamy Caramel Dream Dessert Recipe is easier than you think! After pouring your cheesecake batter over the crust, dollop spoonfuls of warmed dulce de leche over the top. Use a small knife, skewer, or even a toothpick. Gently drag it through the dulce de leche and cheesecake batter. Don’t overdo it! A few confident swirls are better than excessive mixing. Too much mixing can muddy the pattern. Think of it like painting; less is often more for an elegant design. This visual appeal adds magic to your homemade Dulce de Leche Cheesecake Bars, making them truly unforgettable.
How do I properly store any leftover Dulce de Leche Cheesecake Bars to keep them fresh?
To keep your leftover Dulce de Leche Cheesecake Bars | Creamy Caramel Dream Dessert Recipe tasting as incredible as when they were first baked, proper storage is vital. Always store them in an airtight container in the refrigerator. This prevents them from drying out and absorbing other fridge odors. They will maintain their deliciousness for up to 3-4 days. For longer storage, you can freeze individual bars. Wrap them tightly in plastic wrap, then place them in a freezer-safe bag or container. Thaw them in the refrigerator overnight when you’re ready to enjoy another slice of this creamy caramel dream.
Leave a Comment