

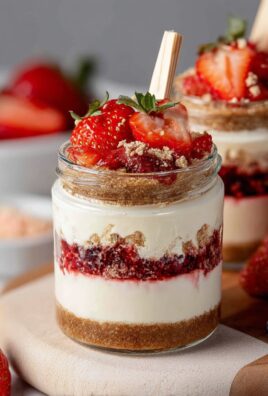
Dubai Chocolate Balls: A Sweet Indulgence
Dubai Chocolate Balls are not just a treat; they are a delightful experience that transports you to the vibrant streets of Dubai with every bite. These decadent little morsels are a perfect blend of rich chocolate and exotic flavors, making them a favorite among dessert lovers. Originating from the Middle Eastern culinary tradition, these chocolate balls often incorporate ingredients like dates, nuts, and spices, reflecting the region’s rich history and culture.
People adore Dubai Chocolate Balls for their irresistible taste and luxurious texture. The combination of smooth chocolate and the crunch of nuts creates a delightful contrast that keeps you coming back for more. Plus, they are incredibly convenient to make, making them an ideal choice for gatherings or a sweet treat at home. Whether you’re celebrating a special occasion or simply indulging in a moment of self-care, Dubai Chocolate Balls are sure to satisfy your sweet cravings.

Ingredients:
- 1 cup of digestive biscuits, crushed
- 1/2 cup of cocoa powder
- 1/2 cup of sweetened condensed milk
- 1/4 cup of unsweetened shredded coconut
- 1/4 cup of chopped nuts (almonds, walnuts, or pistachios)
- 1/2 teaspoon of vanilla extract
- 1/4 cup of chocolate sprinkles (for coating)
- 1/4 cup of melted dark chocolate (optional, for drizzling)
Preparing the Mixture
- In a large mixing bowl, combine the crushed digestive biscuits and cocoa powder. Make sure to mix them well so that the cocoa is evenly distributed throughout the biscuit crumbs.
- Add the sweetened condensed milk to the dry mixture. This will help bind the ingredients together. Use a spatula or your hands to mix until the mixture is well combined and forms a dough-like consistency.
- Next, incorporate the shredded coconut and chopped nuts into the mixture. These ingredients will add texture and flavor to the chocolate balls. Mix thoroughly until everything is evenly distributed.
- Finally, add the vanilla extract to the mixture. This will enhance the overall flavor of the chocolate balls. Stir well to ensure the vanilla is evenly mixed in.
Shaping the Chocolate Balls
- Once the mixture is ready, it’s time to shape the chocolate balls. Take a small amount of the mixture (about a tablespoon) and roll it between your palms to form a smooth ball. Repeat this process until all the mixture is shaped into balls.
- As you shape the balls, you can place them on a baking sheet lined with parchment paper. This will prevent them from sticking and make it easier to transfer them later.
- If you prefer, you can also roll the balls in chocolate sprinkles for an extra touch of sweetness and decoration. Simply place the sprinkles in a shallow dish and roll each ball in the sprinkles until fully coated.
Chilling the Chocolate Balls
- Once all the chocolate balls are shaped and coated, it’s important to chill them in the refrigerator. This will help them firm up and hold their shape better.
- Cover the baking sheet with plastic wrap or aluminum foil and place it in the refrigerator for at least 30 minutes. If you have time, chilling them for an hour or more will yield even better results.
Optional Drizzling with Chocolate
- If you want to add an extra layer of indulgence, you can drizzle melted dark chocolate over the chilled chocolate balls. To do this, melt the dark chocolate in a microwave-safe bowl in 30-second intervals, stirring in between until smooth.
- Once melted, use a fork or a piping bag to drizzle the chocolate over the chilled chocolate balls. This will not only enhance the flavor but also make them look more appealing.
- After drizzling, return the chocolate balls to the refrigerator for an additional 10-15 minutes to allow the chocolate to set.
Serving the Dubai Chocolate Balls
- Once the chocolate has set, your Dubai chocolate balls are ready to be served! You can arrange them on a decorative plate or in a gift box if you plan to share them with friends and family.
- These chocolate balls are perfect for any occasion, whether it’s a party, a festive gathering, or simply a sweet treat for yourself. They are sure to impress with their rich flavor and delightful texture.
- Store any leftovers in an airtight container in the refrigerator. They can last for up to a week, but I doubt they will last that long!
Tips for Perfect Chocolate Balls
- Adjusting Sweetness: If you prefer a sweeter chocolate ball, feel free to add more sweetened condensed milk or a bit of powdered sugar to the mixture.
- Flavor Variations: You can experiment with different flavors by adding a pinch of cinnamon, a splash of orange zest, or even a few drops of peppermint extract for a refreshing twist.
- Nut-Free Option:
Conclusion:
If you’re looking for a delightful treat that combines rich flavors and a touch of indulgence, then the Dubai Chocolate Balls recipe is an absolute must-try! These little bites of heaven are not only easy to make but also incredibly versatile, making them perfect for any occasion. Whether you’re hosting a party, celebrating a special event, or simply craving something sweet, these chocolate balls will surely impress your family and friends.
One of the best things about this recipe is its adaptability. You can easily customize the ingredients to suit your taste preferences. For instance, if you want to add a bit of crunch, consider incorporating crushed nuts or even some crispy rice cereal into the mixture. Alternatively, if you’re a fan of coconut, rolling the chocolate balls in shredded coconut can add a tropical twist that’s simply irresistible. You can also experiment with different types of chocolate—dark, milk, or even white chocolate—to create a variety of flavors that cater to everyone’s palate.
When it comes to serving suggestions, these Dubai Chocolate Balls are incredibly versatile. They can be served as a delightful dessert after dinner, a sweet snack during movie night, or even as a unique addition to a dessert platter at your next gathering. Pair them with a cup of coffee or tea for a delightful afternoon treat, or serve them alongside fresh fruit for a refreshing contrast. You can also package them in decorative boxes or jars to give as gifts, making them a thoughtful and delicious present for friends and family.
I encourage you to try this Dubai Chocolate Balls recipe and experience the joy of creating something so delicious and satisfying. Once you’ve made them, I would love to hear about your experience! Did you try any fun variations? How did your friends and family react? Sharing your journey not only inspires others to try the recipe but also creates a sense of community around our love for food.
So, roll up your sleeves, gather your ingredients, and get ready to indulge in these delightful chocolate treats. Trust me, once you take that first bite, you’ll understand why this recipe is a favorite among chocolate lovers. Don’t forget to share your creations on social media and tag your friends to spread the joy of these Dubai Chocolate Balls! Happy cooking!
Dubai Chocolate Balls: Indulge in the Sweet Delights of the UAE
A delicious and easy-to-make dish that combines fresh ingredients and bold flavors, perfect for any occasion. Enjoy a satisfying meal that is both nutritious and delightful!
Ingredients
- 500 g Mehl (Type 550)
- 10 g Salz
- 5 g Trockenhefe
- 350 ml Wasser
- 3 Zehen Knoblauch, gehackt
- 2 EL Olivenöl
Instructions
- In einer großen Schüssel Mehl, Salz und Hefe vermengen.
- Wasser hinzufügen und zu einem Teig verrühren.
- Knoblauch und Olivenöl unterrühren.
- Teig 12 Stunden gehen lassen.
Notes
- Der Teig darf während der Ruhezeit nicht bewegt werden.
- Für ein intensiveres Knoblaucharoma können mehr Zehen verwendet werden.


Leave a Comment