
Cheesy Pepperoni Pizza Roll Ups: A Delicious Twist on a Classic Favorite
Cheesy Pepperoni Pizza Roll Ups are the ultimate comfort food that brings a smile to everyone’s face. Imagine biting into a warm, gooey roll filled with savory pepperoni and melted cheese, all wrapped in a soft dough. This delightful dish not only satisfies your cravings but also makes for a fun and interactive meal that the whole family can enjoy together.
The origins of pizza can be traced back to Italy, where it has evolved into countless variations over the years. However, these Cheesy Pepperoni Pizza Roll Ups offer a unique twist that combines the beloved flavors of traditional pizza with the convenience of a handheld snack. People love this dish for its perfect balance of taste and texture; the crispy exterior gives way to a soft, cheesy interior that is simply irresistible.
Whether you’re hosting a game night, looking for a quick weeknight dinner, or just craving a tasty treat, these Cheesy Pepperoni Pizza Roll Ups are sure to become a favorite in your household. Let’s dive into this easy recipe that will have everyone asking for seconds!

Ingredients:
- 1 package of refrigerated pizza dough (about 13.8 oz)
- 1 cup shredded mozzarella cheese
- 1 cup sliced pepperoni
- 1/2 cup marinara sauce (for dipping)
- 1/4 cup grated Parmesan cheese
- 1 teaspoon Italian seasoning
- 1/2 teaspoon garlic powder
- 1 egg (beaten, for egg wash)
- Flour (for dusting)
Preparing the Dough
- Start by preheating your oven to 400°F (200°C). This will ensure that your pizza roll-ups bake evenly and get that perfect golden-brown color.
- On a clean, floured surface, roll out the refrigerated pizza dough. If you’re using a pre-rolled dough, simply unroll it and lay it flat. Aim for a rectangle shape, about 12×16 inches, to give you enough space to work with.
- Once the dough is rolled out, sprinkle the Italian seasoning and garlic powder evenly over the surface. This will infuse the dough with flavor as it bakes.
Filling the Roll-Ups
- Now it’s time to add the cheese and pepperoni. Start by sprinkling the shredded mozzarella cheese evenly over the dough, leaving about a 1-inch border around the edges.
- Next, layer the sliced pepperoni on top of the cheese. Feel free to add more or less depending on your preference. I usually go for a generous amount because who doesn’t love pepperoni?
- For an extra cheesy touch, sprinkle the grated Parmesan cheese over the pepperoni. This will add a nice flavor and a bit of crunch to the roll-ups.
Rolling and Cutting
- Starting from one of the long edges of the rectangle, carefully roll the dough away from you, keeping the filling tightly packed inside. Make sure to roll it as tightly as possible without squeezing out the filling.
- Once you reach the end, pinch the seam to seal it. You can also roll the edges slightly to ensure that the filling doesn’t escape during baking.
- Using a sharp knife or a pizza cutter, slice the rolled dough into 1-inch thick pieces. You should get about 12-15 roll-ups, depending on how thick you cut them.
Preparing for Baking
- Line a baking sheet with parchment paper or lightly grease it to prevent sticking. This will make cleanup easier and help the roll-ups bake evenly.
- Place the sliced roll-ups on the prepared baking sheet, making sure to leave some space between each piece. They will expand a little while baking.
- Brush the tops of the roll-ups with the beaten egg. This will give them a beautiful golden color and a shiny finish once baked.
Baking the Roll-Ups
- Once your oven is preheated, place the baking sheet in the oven and bake for about 15-20 minutes. Keep an eye on them, as baking times can vary depending on your oven.
- When the roll-ups are golden brown and the cheese is bubbling, remove them from the oven. The aroma will be irresistible!
- Let the roll-ups cool for a few minutes on the baking sheet before transferring them to a serving platter. This will help them set a bit and make them easier to handle.
Serving Suggestions
- While the roll-ups are cooling, warm up the marinara sauce in a small saucepan or microwave. This will make for a delicious dipping sauce.
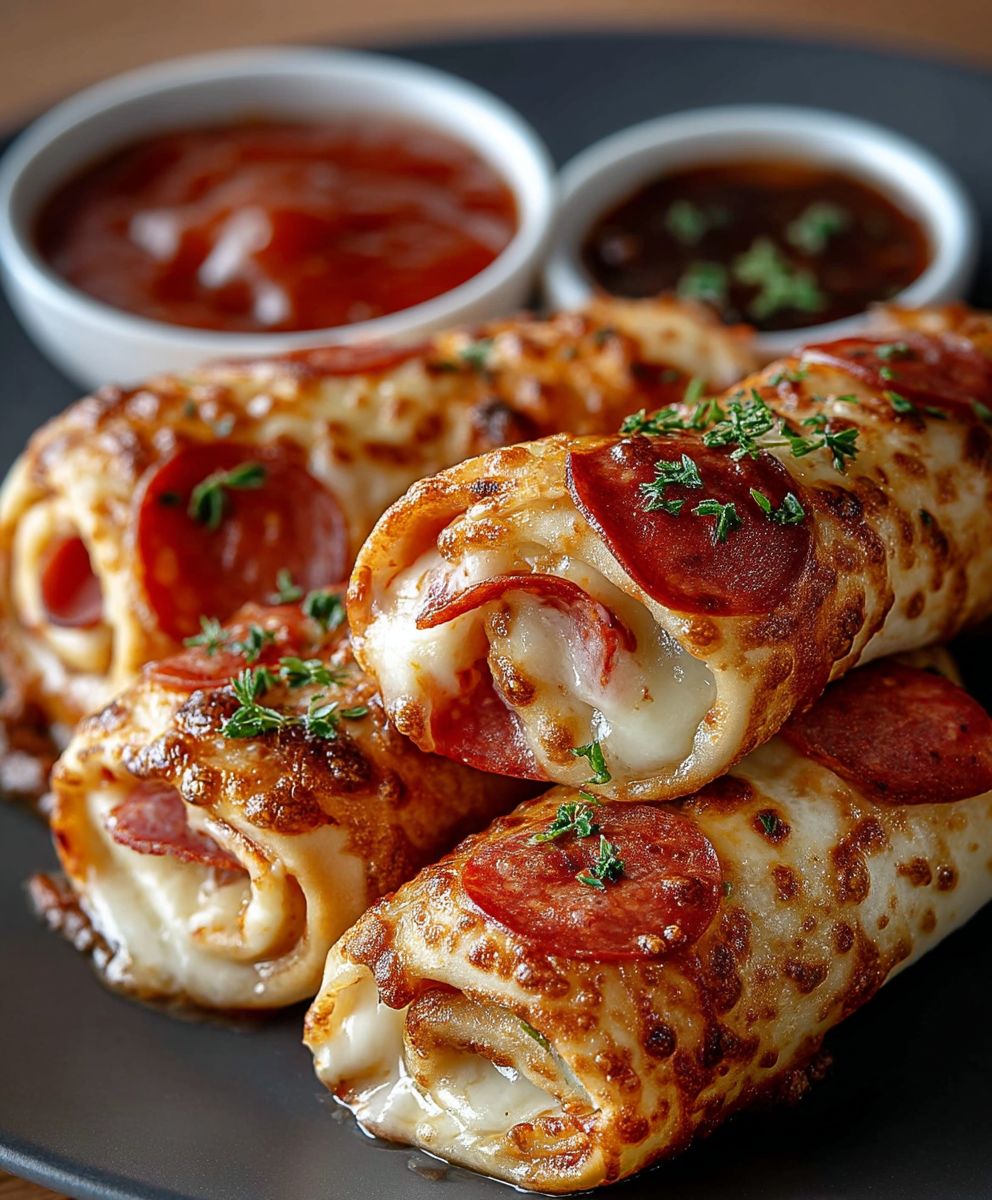
- Serve the cheesy pepperoni pizza roll-ups warm with the marinara sauce on the side. They make a fantastic appetizer, snack, or even a fun meal!
- If you want to get creative, you can also serve them with a sprinkle of fresh basil or a drizzle of olive oil for added flavor.
Storage Tips
- If you have any leftovers (which is rare in my house!), let them cool completely before storing them in an airtight

Conclusion:
If you’re looking for a fun and delicious way to enjoy pizza, then these Cheesy Pepperoni Pizza Roll Ups are an absolute must-try! They combine the classic flavors of pizza with a unique twist that makes them perfect for any occasion. Whether you’re hosting a game night, preparing a quick snack for the kids, or simply craving something cheesy and satisfying, these roll-ups are sure to impress. The gooey cheese, savory pepperoni, and soft dough create a delightful combination that will have everyone coming back for seconds.
For serving suggestions, I recommend pairing these roll-ups with a side of marinara sauce for dipping. The tangy sauce complements the cheesy goodness perfectly and adds an extra layer of flavor. You can also serve them alongside a fresh salad or some crunchy veggies to balance out the richness. If you want to get creative, consider adding different toppings to your roll-ups. You could try incorporating sliced olives, bell peppers, or even a sprinkle of Italian herbs for an extra kick. The beauty of this recipe is its versatility; you can easily customize it to suit your taste preferences or dietary needs.
I encourage you to give these Cheesy Pepperoni Pizza Roll Ups a try! They are not only easy to make but also a hit with both kids and adults alike. Once you’ve made them, I’d love to hear about your experience. Did you stick to the classic recipe, or did you add your own twist? Sharing your thoughts and variations can inspire others to try this delightful dish. Plus, it’s always fun to connect with fellow food lovers and exchange ideas!
So, roll up your sleeves and get ready to indulge in these cheesy delights. I promise you won’t be disappointed. Whether you’re enjoying them as a snack, appetizer, or even a main dish, these roll-ups are bound to become a favorite in your household. Don’t forget to snap a picture of your creations and share them on social media—tagging your friends and family will surely get them excited to try this recipe too! Happy cooking!
Cheesy Pepperoni Pizza Roll Ups: A Delicious and Easy Recipe
A delicious and easy-to-make dish that combines fresh ingredients and bold flavors, perfect for any occasion. Enjoy a satisfying meal that is both nutritious and delightful!
Ingredients
- 500 g Mehl (Type 550)
- 10 g Salz
- 5 g Trockenhefe
- 350 ml Wasser
- 3 Zehen Knoblauch, gehackt
- 2 EL Olivenöl
Instructions
- In einer großen Schüssel Mehl, Salz und Hefe vermengen.
- Wasser hinzufügen und zu einem Teig verrühren.
- Knoblauch und Olivenöl unterrühren.
- Teig 12 Stunden gehen lassen.
Notes
- Der Teig darf während der Ruhezeit nicht bewegt werden.
- Für ein intensiveres Knoblaucharoma können mehr Zehen verwendet werden.


Leave a Comment